


How to Compress and Extract ZIP Files on iPhone and iPad – Apple is slowly bringing many file management features to iOS and iPadOS. This can be seen as Apple’s renewed push to make its devices much more productive and useful. With iOS 13 and iPadOS 13, you can easily extract ZIP files on your device and that’s an amazing new feature.
And there’s more, you can also create ZIP compress files directly from the Files app. So, in this article, I bring you a hands-on guide on how to compress and extract ZIP files on iPhone and iPad. I’ve also mentioned another method that lets you deal with other archive formats as well as use them in iOS 12. Let’s get started:
Compress and Extract Archive Files on iPhone and iPad
As I have mentioned above, you can manage archive files directly via the Files app on iOS 13 and iPadOS 13. However, it only supports two archive file formats (ZIP and RAR) and there are some limitations to compressing files. So, if you want to remove compression of other file formats like TAR or 7z and without any restrictions then you can use the Shortcuts app method which I will discuss below. Furthermore, if you are using iOS 12, you can also use the Shortcuts app to seamlessly zip and unzip files.
For iOS 13 and iPadOS 13
iOS 13 has native support for compressing ZIP and RAR files. However, you can only compress folders to the ZIP file format. For most purposes, it is adequate and works very well. If you want more options, you can move to the next section. And here are the steps.
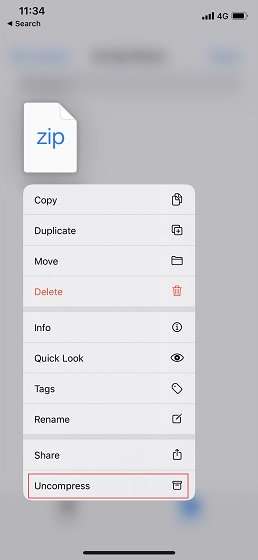
1. To uncompress a ZIP or RAR file, open the Files app on your iPhone or iPad and find the file you want to unzip. Now, tap and hold on the compressed file and you will find several options. At the bottom, tap on “ Uncompress ” and a new folder will be created with all the contents of the files in it.
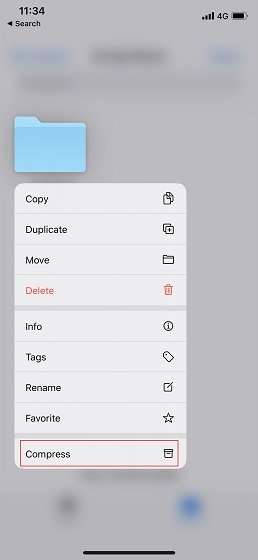
2. Similarly, to compress a folder on your iPhone or iPad, tap and hold the folder you want to compress and select “ Compress ” at the bottom. The ZIP file will be created immediately.
For iOS 12 and Other Archive Formats
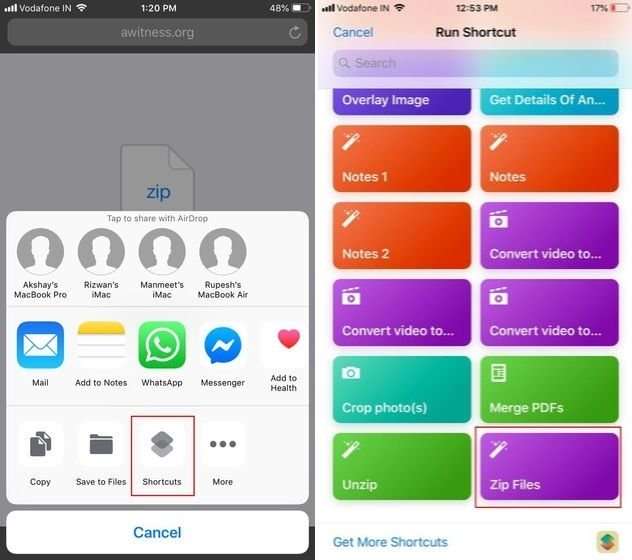
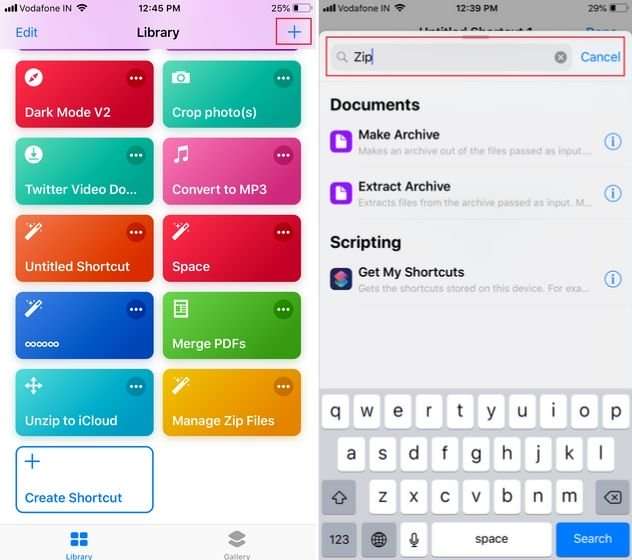
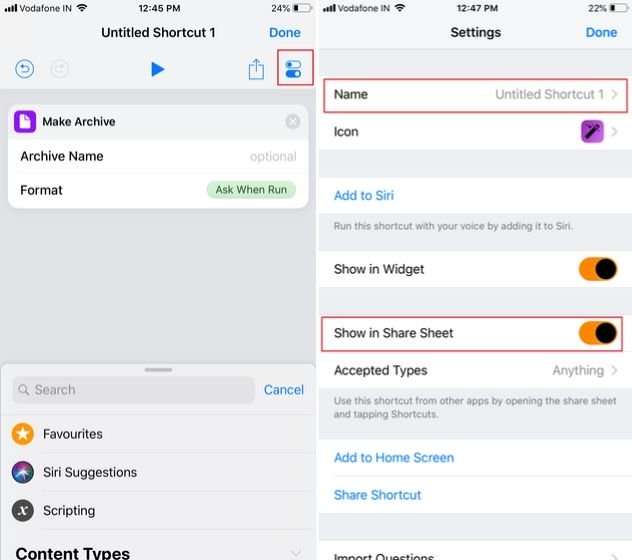
1. Open the Shortcuts app and tap the “+” button in the upper right corner. After that, look for “zip” and tap “Make Archive” to compress the files. Likewise, you can add “Extract Archive” to extract files as another shortcut.
2. Next, tap the edit icon in the top right corner and toggle the toggle button for “Show in share sheet”. Furthermore, you can give names to your Shortcuts as well.
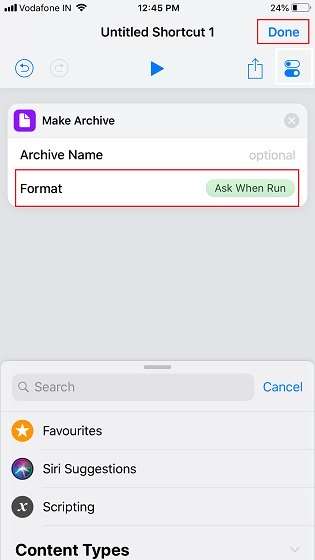
3. After that, change the format to “Ask When Run” so you can choose the archive format you want. After doing so, tap on the “Done” button at the top right corner to save the Shortcut.
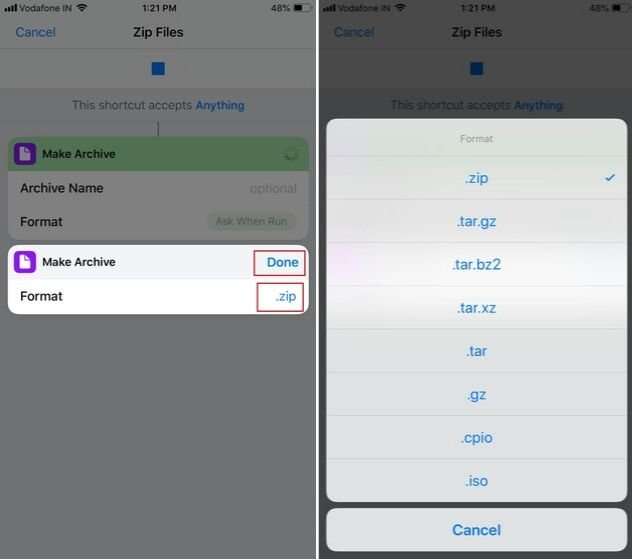
4. Now, just share the file with the Shortcuts app and select a specific Shortcut.

5. You will be prompted with the “Save” dialog box. Here, you can change the file format and then tap “Done” to finally compress the file. You can find compressed files in the Files app.
Read: Explanation of Email Archive and How to Archive Emails in Gmail
So that was our quick guide on how to compress and extract ZIP files on iPhone and iPad. If you have updated to iOS 13 or iPadOS 13 then the process is very easy as the system now supports these features natively. However, if you want more flexibility then you can use the second method. Hopefully this is useful 🙂

