


Creating a site with WordPress : that’s what you Google searched for, right? Probably because you are a blogger , a professional or have a company and you want to create your website quickly, easily and for free . Well, you are in the right place!
I have developed this guide to answer your curiosities: how to install WordPress , the themes , the best plugins and some tips from SEO consultant to improve your search engine rankings !
This WordPress guide has been written in as clear a language as possible and so as not to leave out any aspect. If you have any questions or suggestions to improve it, leave a comment at the end of the page!
Do you want to find out how to create a site with WordPress? Let’s go!
Nb: I’m not a fan of Gutenberg, I prefer the classic editor. This is what you will also find in some screenshots of this guide and that you can activate with the Classic editor plugin.
What are we talking about
- 1 Premise: what is WordPress?
- 2 Design the contents and choose the keywords
- 3 The domain and hosting: what they are, how to choose them
- 4 Install WordPress
- 5 First steps: indexing
- 6 Plugins: what they are
- 7 The graphic part: the Themes
- 8 Add content: Create Pages
- 9 Create a blog
- 10 Media Management
- 11 The menus
- 12 Widgets: what they are and how to configure them
- 13 Configure the footer, create the sitemap
- 14 How many hits does your site make? Configure Google Analytics
- 15 Publication: make the site visible to all
Premise: what is WordPress?
WordPress is a quick and easy tool for creating blogs, websites, e-commerce. Fast and intuitive, it is the most powerful and popular CMS . What does it mean? Content Management System, or software for creating websites that do not require any programming knowledge.
WordPress is used by web agencies around the world. Despite this, creating a site with WordPress is simple. In this guide I will give you the basic suggestions: if you want to deepen some aspects, you can always contact me!
If you want to verify that a certain site you like is made or not with this CMS, read this guide: How to see if a site is made in WordPress!
Are you ready? Let’s begin!
Designing the contents and choosing the keywords
The starting point is the question: “What do I want to talk about?”. In fact, it is necessary to establish the topics and contents of the site and, in the case of a blog, to draw up an editorial plan .
For example, if you have a company or are a professional, it is advisable to define the characteristics of the product / service you offer, the target audience, the tone of communication (professional, emotional, etc.). If you are a blogger , it is important to identify your niche, that is the sector you intend to occupy (fashion, music, cinema, etc.), and understand how to attract readers.
From this point of view, the competition analysis is very useful. Before creating a WordPress site, look at those of your competitors’ companies, professionals and bloggers, and make a list of the things that you think work and those that you just don’t like. It will help to clarify your ideas on the type of site you want to create and, above all, it will allow you to consistently design your web presence.
Then, the identification of keywords and trends on the web is fundamental: knowing which keywords and topics are most searched for in your reference sector will help you to develop content capable of intercepting the tastes of the public and gaining visibility on the engines. of research.
Psst: if you want to know more about the choice of keywords and the positioning of a site, I suggest you read my SEO guide!
The domain and hosting: what they are, how to choose them
The choice of domain and hosting is a very delicate phase. Let’s start by clarifying some concepts.
The domain of a website – in a simple way – is the name of the website (for example, wpradar.com/test2). Domains in this form exist thanks to a “translation”: the DNS (Domain Name System, or Domain Name System) transforms the IP address (a sequence of numbers that identifies a device connected to the network) into a sequence of characters understandable.
Here, in detail, how a domain is composed:
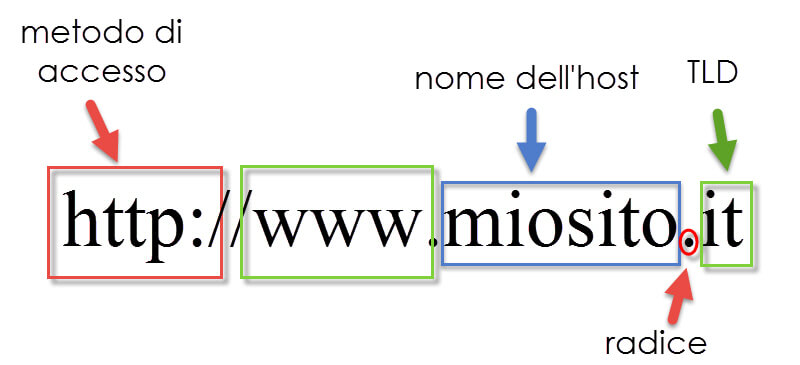
Buying the right domain can make your website successful. To begin with, for the impact it has on users: a clear, concise domain is striking and can be remembered. And then there’s the question of search engine rankings : a domain that contains keywords relevant to your business is more likely to appear at the top of search results.
If, on the other hand, you already have clear ideas, all you have to do is check that the domain in question is actually available and proceed with the purchase. Buying a domain is simple and inexpensive: you can contact Misterdomain .
Then you need to choose the hosting for your WordPress site . What is hosting? It is the space on the server that will hold the data (files and folders) that make up your website.
Which hosting to choose? There are many. The best WordPress hosting in my opinion? Siteground ! Powerful, fast, easy to use and well optimized. Click on this link to discover plans and services!
If you need any advice on how to choose your domain or hosting, write me !
Install WordPress
Once you’ve established your site’s content, and purchased your domain and hosting, you can start building a site with WordPress! At this point, you need to install WordPress . WordPress installation is a simple procedure, but it must be done step by step:
- Download WordPress in Italian from the official site ;
- Create a database . To do this, access the control panel of your hosting, select the appropriate item (it depends on the hosting provider you contacted) and assign name and password to your database;
- Open the WordPress archive you downloaded – it’s a zip file, unzip it. Open the folder: look for the wp-config-sample.php file and rename it to wp-config.php ;
- Open the wp-config.php file with a text editor (Windows Notepad is fine too) and make these changes:
- In the string define (‘DB_NAME’, ‘database_name_here’); instead of database_name_here enter the database name of your WordPress hosting;
- In the string define (‘DB_USER’, ‘username_here’); instead of username_here enter the username of the WordPress database administrator;
- In the string define (‘DB_PASSWORD’, ‘password_here’); instead of password_here enter the password of your WordPress database;
- In the string define (‘DB_HOST’, ‘localhost’); replace the corresponding value (for many hosting providers, such as Aruba, it is always localhost , but there are exceptions );
- Under the section “Unique Authentication and Salting Keys” , enter the security keys as indicated on the WordPress site .
- From the control panel of your WordPress hosting, select the File Manager (or the Upload tool) and upload the files contained in the WordPress folder you downloaded to the root directory of the site;
- Once the operation is complete, connect to this address: address of your site / wp-admin / install.php (eg wpradar.com/test2/wp-admin/install.php). This will start the WordPress installation . During the procedure, you will need to enter the site title (you can always change it), the username and password to access the WordPress control panel , and your e-mail address.
First steps: indexing
To access the WordPress control panel, in the address bar of your browser type:
address of your site / wp-admin
Here enter your username and password, et voilà: welcome to the administrative area of your site!

Before creating articles and pages, a tip: work incognito! Through an option, in fact, it is possible to “hide” the site from search engines and block indexing .
How to do? From the control panel, go to Settings> Reading , scroll the page and put the check mark on “Discourage search engines from indexing this site” . (I did it myself before putting this article online: if someone had searched for “WP Radar” on Google they would not have found any results referring to this blog.)
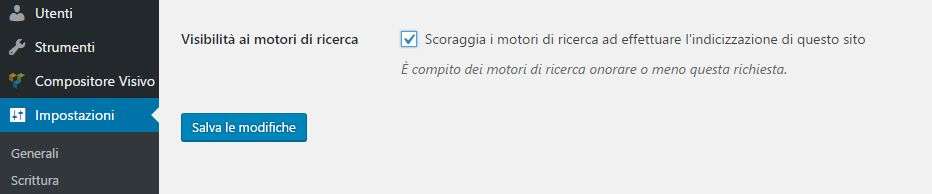
When articles, pages and contents are ready, and therefore you are ready to launch your website, remember to remove the check : in this way, you will have the opportunity to appear in the results of Google and other search engines. Before creating a site with WordPress, however, make sure you can work undisturbed!
Permalink
Another very useful change that I recommend you do right away is that of permalinks .
It is a matter of deciding what form your site’s urls (addresses) will take. WordPress, by default, adopts this structure: http: // site name /? P = 123malink.php
You will agree that from this url it is rather difficult to understand what the page is about: much clearer http://www.nomesiti.it/titolo-dell- Articolo.
Therefore, it is better to adopt the so-called “talking addresses” . As? Still in the WordPress control panel, go to Settings> Permalink and select “Article Name” (or, if you have special needs, “Custom Structure” ). This way you can have clear and captivating screams too!

Plugins: what they are
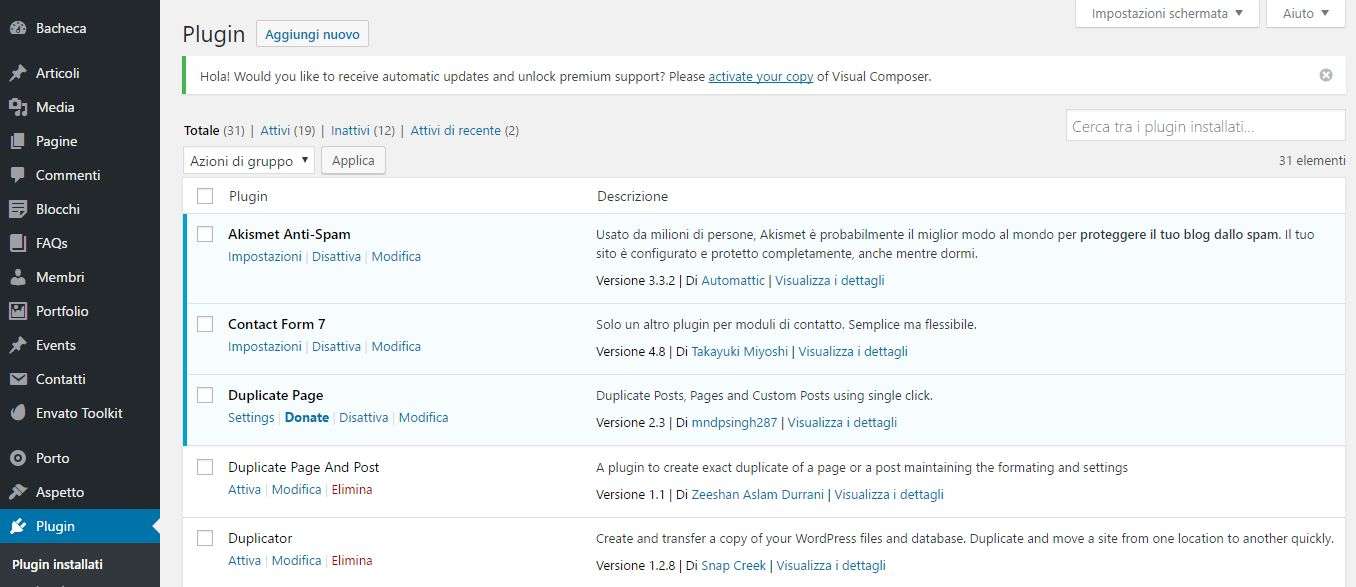
WordPress plugins are “pieces of code” or programs that extend their basic functions.
There are many, many WordPress plugins, and for the most desperate needs: check for yourself on the official website . To get started, I recommend installing two of them:
- WordPress SEO by Yoast is simply the best WordPress plugin : it allows you to optimize content for search engines and therefore increase the visibility of your website. Read my guide to Yoast SEO!
- Ultimate Coming Soon (find it here ): whoever connects to your website will see a screen that warns them of the “work in progress”.
Moreover, plugins can greatly affect the functionality of your website and it’s a good idea to install a few ones at the start of your journey. They can be used for a wide variety of things and will provide your users with great user experience. For example, if you want to create a beatiful landing page (which you should since it is the first thing a visitor will see), you should check out Coming Soon & Maintenance Mode.
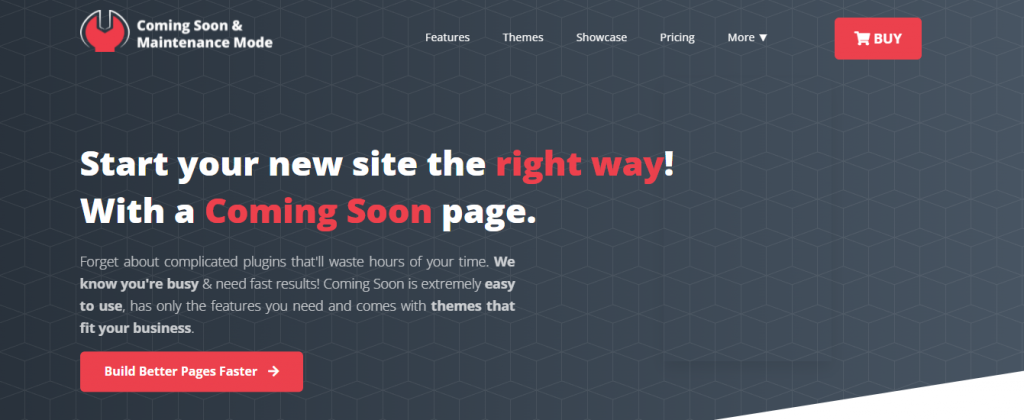
It is a plugin that provides you with a large number of images and themes that you can use in creating your coming soon and landing pages. With it, you can build traffic even before your website is officialy published. Show your visitors what’s coming and raise anticipation. The great thing is, you can even build your email list from that page alone.
The next plugin I want to mention is the WP Reset, the ultimate cleaning and recovery tool you will want to have in yoru arsenal. It’s designed to take care of all things to do with maintaining your website and solving any possible issues. The best part of it is its Snapshots feature, which allows you to take a snapshot of your website before doing any changes to it.
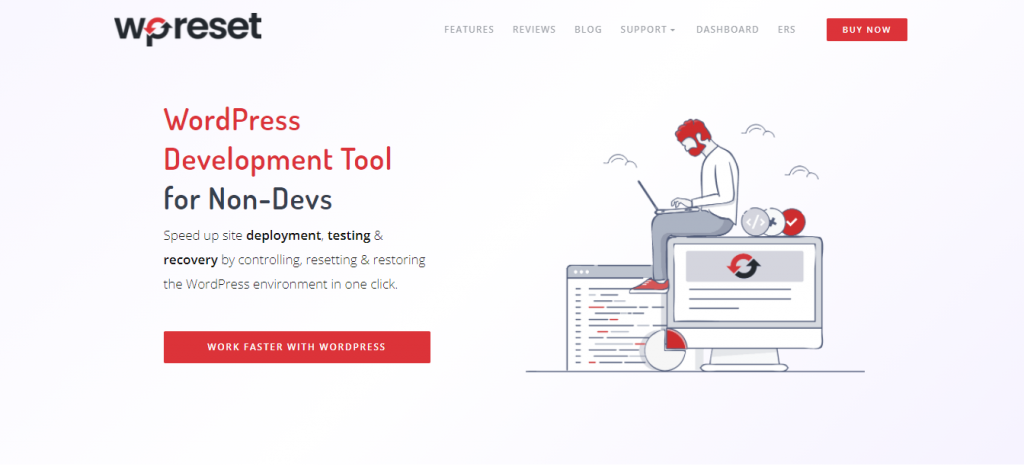
That way, if you mess up or just don’t like the way it turned out, you can easily revert back to the state your website was in when you took thh snapshot. Doesn’t that sound awesome? What is more, WP Reset allows you to enable or disable multiple other plugins with just one click, saving you a great amount of time.
Finally, you can use the Nuclear Reset option when you can’t do anything else, and it will wipe your website completely clean, leaving you with a clean slate.
The last plugin I want to mention here is the WP 301 Redirects, a plugin that takes care of all your redirects and ensures your visitors reach the correct page. That way, when you update or make changes to your URL, your visitors won’t reach the 404 page, but rather the page they were really looking for.
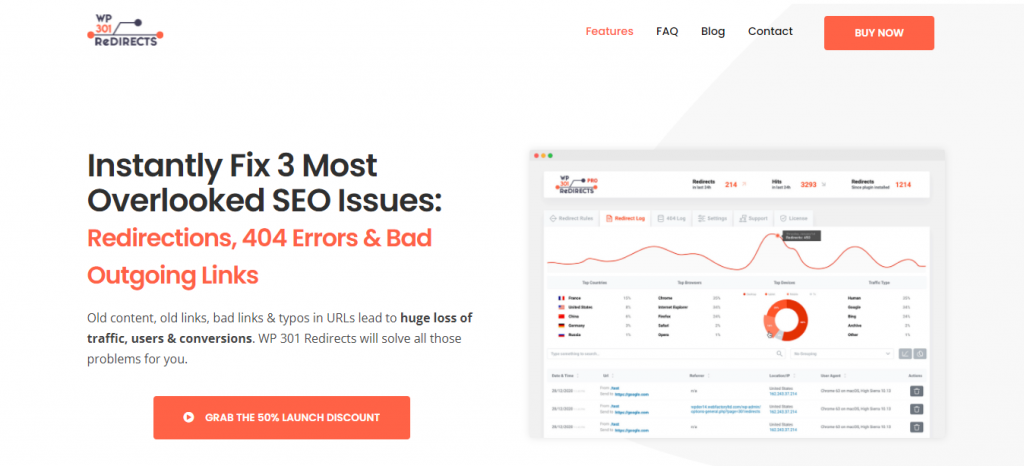
That being said, WP 301 Redirects ignores bots and will not do the same to them. You can sure that they will still reach the wrong page, and you will only have the traffic you want. Plus, this plugin scans and verifies each links to make sure it’s working.
Do you want to know more about the topic? Read my guide to the best WordPress plugins!
How to install a WordPress plugin
There are two ways:
- Download the plugin you are interested in from the official website https://it.wordpress.org/plugins/ . The plugin is downloaded in the form of a compressed folder. From the WordPress control panel, go to Plugins> Add new : click on “Upload plugin”, select the folder of the WordPress plugin you downloaded and install.
- From the control panel, go directly to Plugins> Add New and search there for the plugin to install. When you have found it, click on “Install Now”.
Immediately after installation, remember to activate the plugins by clicking on the appropriate item!
The graphic part: Themes
WordPress themes represent the graphic component of your site and, at the same time, add specific functionality. Without them, you simply cannot create your site with WordPress!
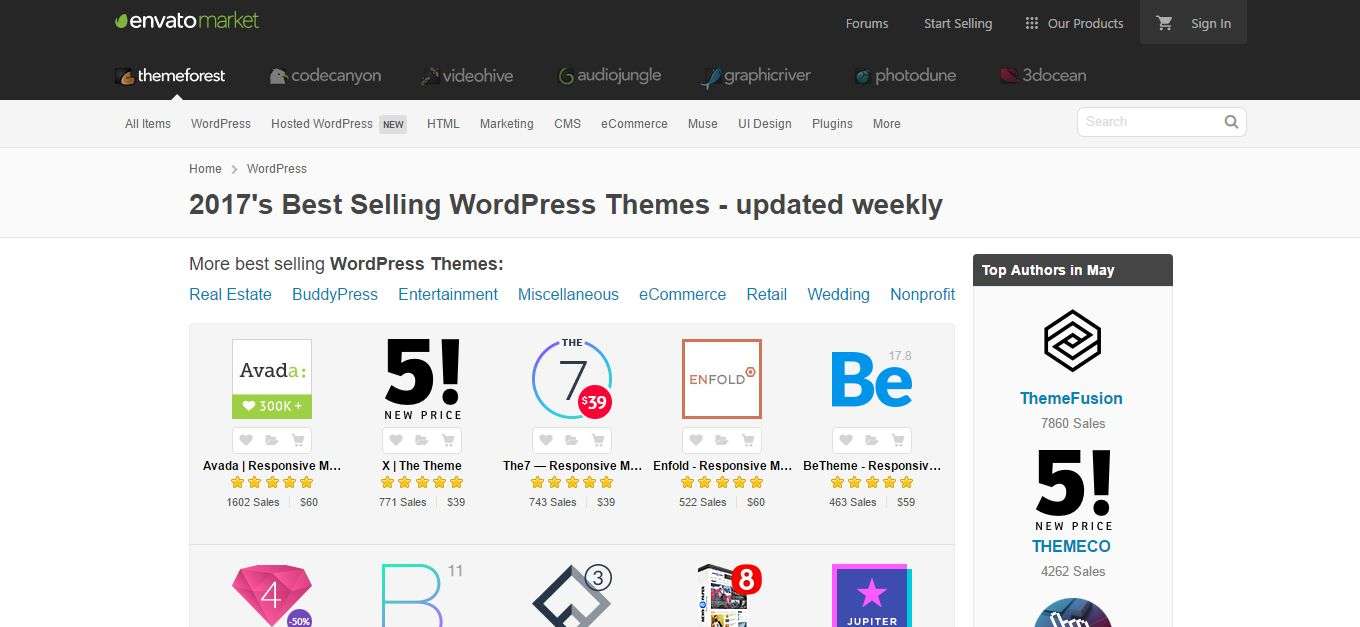
WordPress themes are divided into two categories: free and premium , that is, those that can be downloaded for free and those that are paid for. I highly recommend the latter: they cost (not too much: 50-60 dollars) but brilliant graphics, many functions and technical assistance for at least 6 months.
WordPress usually has two to three free themes installed by default, but if you want to buy a premium theme for your site, then ThemeForest is the best place. Enter the area dedicated to WordPress and choose the ideal theme for the site you want to create ( personal blog, company site, e-commerce, etc. ). If you want to use a free theme instead, take a look at this official selection .
How to install a WordPress theme
Installing a WordPress theme is super easy! After purchasing and downloading the theme (it is in the form of a zip folder), from your site’s control panel go to Appearance> Themes , then click on “Add new”. Select the folder and that’s it – your theme is installed. You will find it in the Themes section, where you can preview it and, if you like, apply it to your site.
Customizing the theme: can it be?
Without being a programmer, there are a number of things you can do to make the theme you’ve chosen for your site more beautiful or personal. If you go to Appearances> Customize , you have the opportunity to change fonts, colors, the title of the site, insert the logo, create the menus . If you are an expert (if you are not, forget it) you can also modify the CSS , or the style sheet , the set of graphic rules of your website.
Just go to Appearance> Customize> Additional CSS to add new rules or overwrite existing ones. Alternatively, you can edit the .css files located in the theme folder contained on your hosting space.

Add content: create Pages
Your website slowly takes shape: now it’s the turn of the pages . These are divided into static pages and dynamic pages . For example, my site’s homepage is static; this page is instead dynamic, because it updates itself every time I insert a new article.
But let’s not go into technical issues. What you need to know is that static pages are usually ideal for presenting your personal / professional profile or your company (its history, philosophy, etc.)
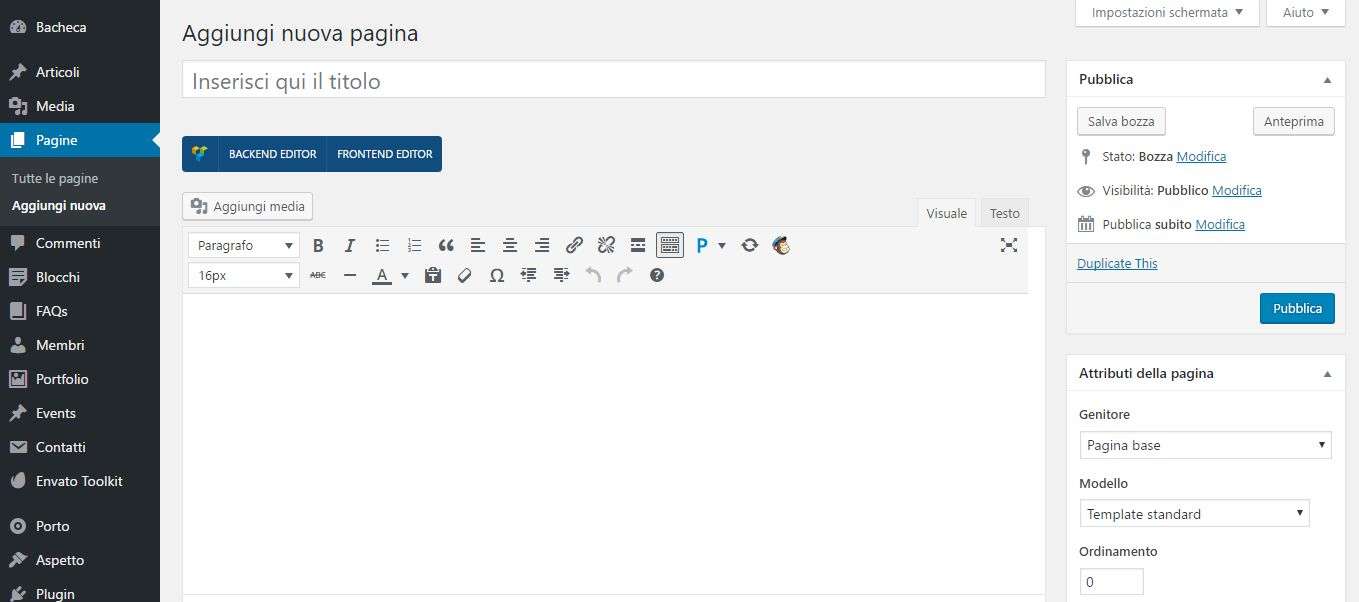
From your control panel you can create as many pages as you want. Just go to Pages> Add New . Here you can give it a name, enter some text and, if you have installed the WordPress SEO by Yoast plugin , also configure the metadata (i.e. useful information for search engines to index your content).
Depending on the theme you have installed, on the right column you also have a drop-down menu that allows you to assign a model or template (i.e. a graphic structure) to the page. You can also determine if yours is a “Basic page” or if it is hierarchically ‘daughter’ of another page you have created (for example: “About me” can be a basic page, “My training” and “My professional experiences ”can be ‘daughter’ pages). (For the functionality of the text editor and the various boxes, I refer you to the paragraph dedicated to posts / articles, further down).
Once the content is ready, you can decide to publish the page. If you need some other revision, you can save it as a draft.
With the procedure I have described you can create the typical pages that all websites have: Home, Who I am / About / The company,Services / Curriculum, Contacts etc. The (premium) WordPress themes offer already structured solutions, in which you just need to change texts and images!
The same goes for the contact pages, which, however, can be enriched by a very useful plugin such as Contact Form 7 , which allows you to create the characteristic forms in which anyone interested in contacting you can enter Name, Surname, email and, above all, the message. If you have a business, it might be a good idea to also download a plugin to insert a Google map that shows your users the exact location of your business. (Read the complete guide on how to insert a map in WordPress! )
So far we have talked about static pages . If you want a dynamic home page , in the control panel go to Appearance> Customize> Static home page – there you will have the option to set a dynamic home, just like I did.
Create a blog
A blog is a very useful tool: not only to communicate your personal thoughts, also for companies. In fact, it allows you to establish a unique relationship with customers, updating them on the latest news or offering them interesting news and content, able to increase engagement and, therefore, to increase the value of the brand.
Depending on the theme you have chosen, your site may already have a blog. Otherwise, you can always create one. It’s easy: create two pages “Home” and “Blog” according to the procedure seen above. Go to Appearance> Customize> Static home page and check “A static page” . From the “Home” drop-down menu, select the “Home” you just created; from the drop-down menu “Articles page” , instead, select “Blog”. What’s up? That all the articles you write will make up your blog!
Ps: if you want to have all the articles on a specific page, read my guide How to insert an article on a WordPress page .
Update the blog: write a post. Tags, categories, images
Well now you can create your first blog post! Go to Articles> Add new : enter a title and body text. The editor has functions similar to those of word processing programs such as Microsoft Word , with italics, bold, underline, text alignment, possibility to insert links (the icon with the chain) and other more or less important functions.
Some themes allow you to write a post summary , a kind of “preview” that users can read on the main blog page for each article. If your theme does not have this function, you can always use the “Insert the Read All tag” button .
Categories and tags
WordPress allows you to “classify” articles based on categories and, secondly, tags .
Do you want to create a category? In the article insertion screen there is a panel on the right column: click on “+ Add new category” (eg. “WordPress” , that is the category in which the article you are reading is inserted) and the game is done.
Tags are the keywords that we can associate with our articles. You can insert them in the panel that you find immediately below the categories: insert the tags one after the other, separated by a comma.
Categories and tags generate dynamic archive pages: here, for example, there is the archive of the “WordPress” category, here instead the archive of the “web design” tag. As you can see, these are pages that summarize the contents which, as mentioned before, are automatically updated every time you associate that category or tag with a new article.

Insert pictures
You can also insert images in articles (and pages). You can do this within the piece (by clicking on “Add Media” , the button you find right above the text editor) or by placing an image “in evidence”. The image in evidence is the one that appears in preview, for each article, on the main page of the blog: you find the insert button on the right column, usually under the tag block.
You can associate a series of information to the images: I suggest you focus on the title , the caption and the alternative text : these are useful information both for the reader and for the search engines!
From a code point of view, here’s what an image ( tag) looks like:
Insert video
Inserting a video into an article can be a good idea to engage the reader more and induce him to dwell on the page more.
How to post a video on WordPress? If the video is on YouTube or Vimeo , just open its page, copy the url and then paste it directly into the text area, where you want it to appear. Try it, it’s very simple!
If you want to have more control over your video, you can use the embed code . Open the video’s YouTube page and go to Share> Embed Code . Select Show more : you will be able to change the size of the video, choose whether or not to show the player controls, the video title and the player actions and select the advanced privacy mode (in this case, YouTube does not store information about the visitors of the your web page, unless they play the video).
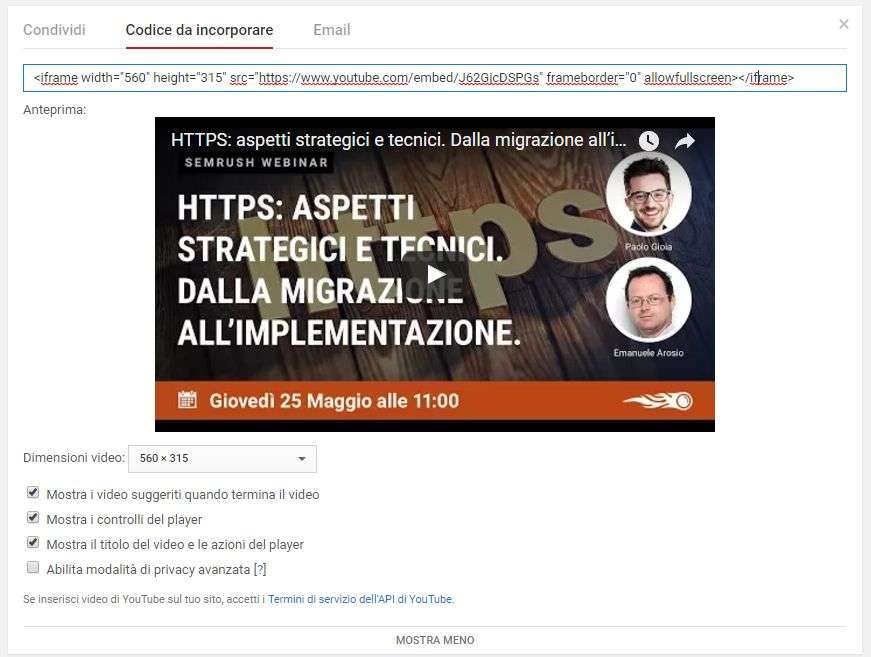
Once you have selected the options you are interested in, copy the code and paste it in the Text area of the editor at the desired point. You can repeat the same operation with Vimeo and other platforms too!
Post format
The post format is the type of article you want to create. You have several options (also depending on the theme you have chosen): you can create standard posts, or only with images, or with a video or audio “in evidence” (instead of the image) and so on. Have fun testing all the possibilities to find out which format is best suited to your posts!
Media management
As we have just seen, on WordPress you can upload images (or files you want to link to your article) through the “Add media” button directly in pages or articles. You can also do this from the control panel, via Media> Library . In this section you can manage all uploaded media files (images, videos, but also pdf, .doc etc.): by clicking on an image, for example, you can add title, caption and alternative text , or modify it (cut it, resize it, etc.).
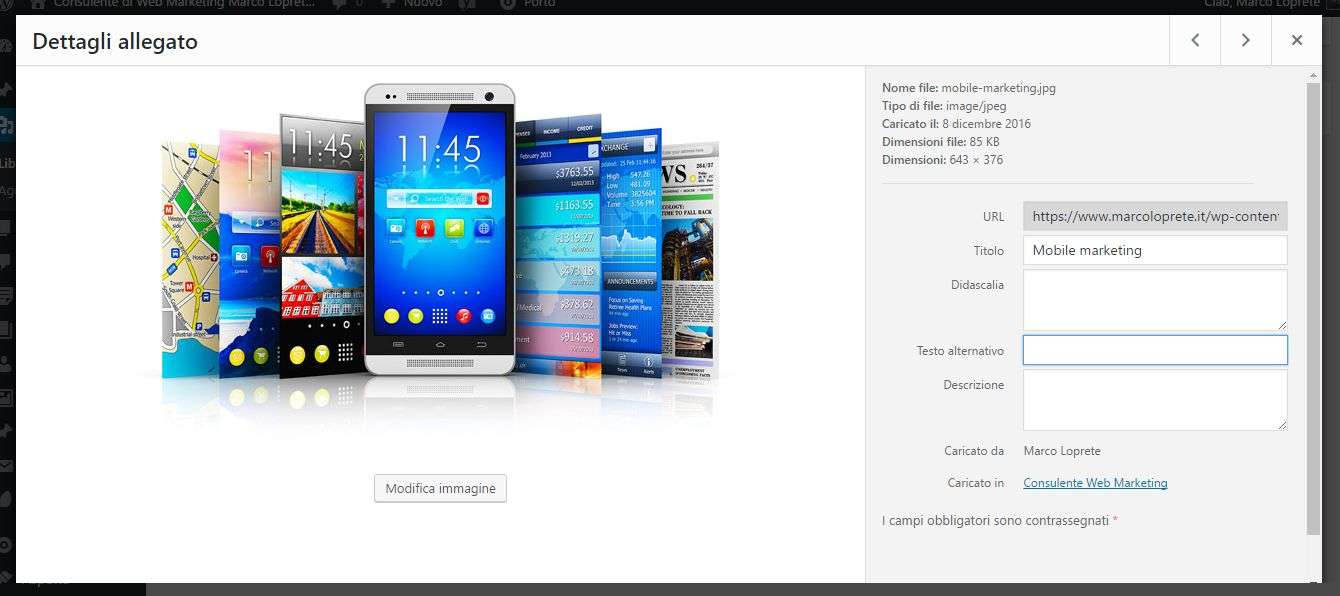
To add a new image to the library , just drag the file into the space provided or, alternatively, click on “Add new” and select the file to open.
Create the pages, the articles, become familiar with the media, now it is necessary to work on the arrangement of the contents and information on the site. First, then, the menu: go to Appearance> Menu . The installed template probably already has its menu active: you can choose whether to modify it or create a new one.
Do you want to add or remove pages? In the “Menu structure” area, drag the rectangles with the items and change the display order, or click on the item you are interested in and then press “Remove”.
In the “Pages” box, check the page you are interested in and click on “Add to menu”.
In the bar at the top of the page, click on “Create new menu”. Enter the menu name and click on “Create menu”. Now you just have to add the contents according to the procedure seen above. You can search for your new menu items between pages, but also between articles, categories (my “WordPress” menu item is obtained this way) or create a custom link (if you want, for example, that a menu items references to an external link).
Widgets: what they are and how to configure them
To create a site with WordPress you also have a series of elements that enrich it with specific features, locating them in certain parts of the screen. In a word, widgets .
The widgets on your site depend on the theme and plugins you install. The widget management area is in the control panel: Appearance> Widgets . Here you will find a screen that shows (on the left) the widgets that can be activated and (on the right) the active ones, divided according to the portions of the screen that, according to the structure of your theme, they can occupy.
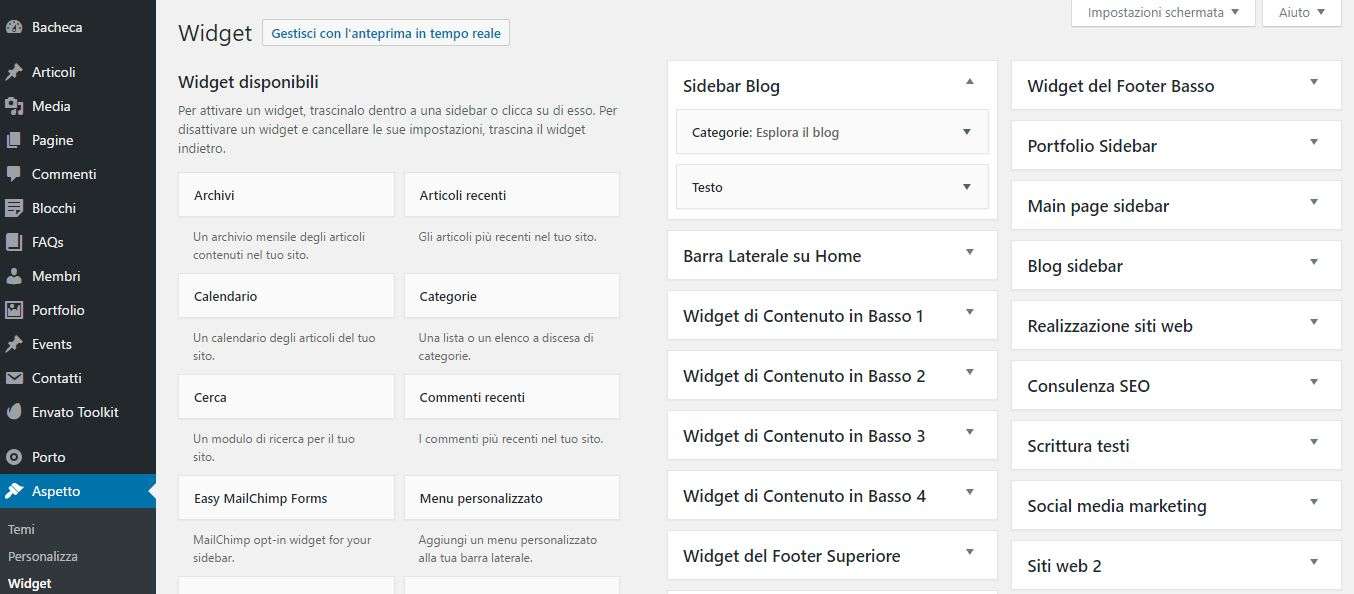
The core WordPress widgets are:
- Search field: this is the area in which to search for content on your site;
- Recent Posts: Shows the latest posts posted on your blog;
- Popular posts: show the most read posts on your blog;
- Facebook (and social networks in general): these are widgets that show likes on your Facebook page, the latest clicks on your Instagram profile, the latest tweets, etc .;
- Newsletter: allows users to enter their email and subscribe to your blog newsletter.
Thanks to widgets you can also insert advertising banners on your site. For example, if you have activated Google AdSense (the Google tool that allows you to earn with clicks on advertisements), just insert the banner code in a widget (it can be the classic text widget, perfect for containing code generic html, or a specific widget ).
With the widgets you can also insert banners of affiliate products ( affiliate marketing ): to find out more, read the dedicated Wikipedia page , the Wired article, or consult Zanox (one of the world’s leading affiliate marketing platforms).
Well, there you have it: a few more tweaks here and there and you’re ready to publish your site!
First, however, remember to configure the footer , especially if you have a company or are a professional. The footer (the lowest area of your site) is the ideal place to summarize your contact information (including social links) and enter your VAT number. You can usually change the footer in the widget area.
To improve your positioning on search engines it is very important to create a sitemap . You can do this with the SEO by Yoast WordPress plugin, which you installed at the beginning. From the control panel go to Seo> XML Sitemap and click on “Enabled”. Now, through the “XML Sitemap” button , you can access your site map, typically located on the address of your site / sitemap_index.xml . To learn more about Yoast, read my guide!
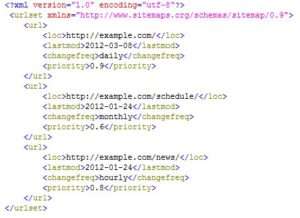
Alternatively, you can use an external service such as XML Sitemap Generator .
How many hits does your site make? Configure Google Analytics
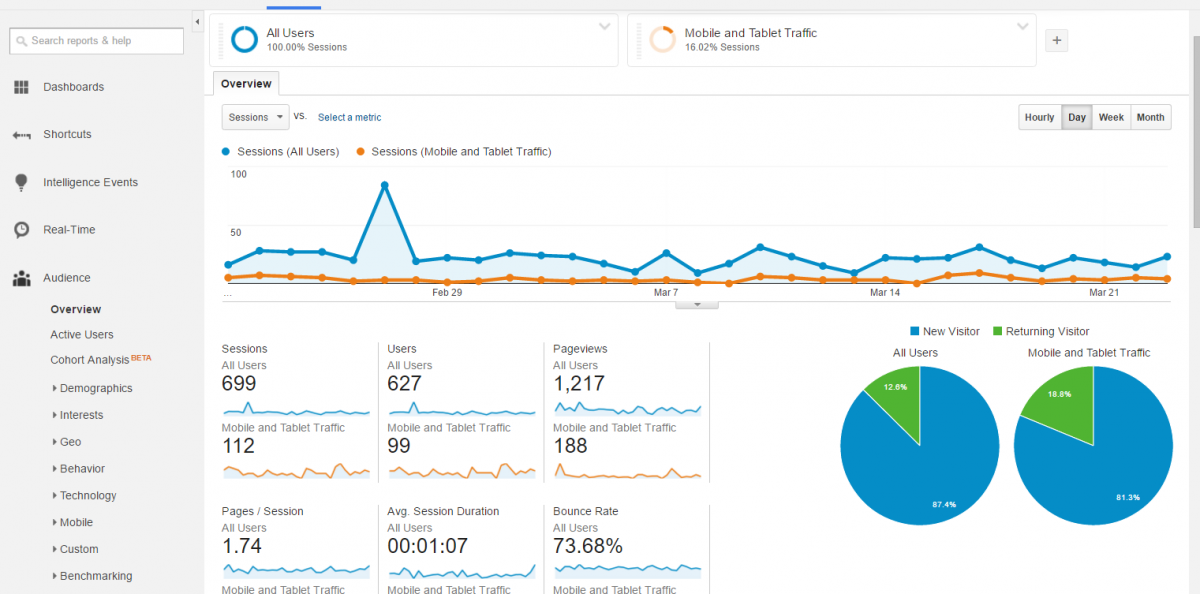
Google Analytics is a very powerful tool for monitoring access to your site.
First, create an account here: https://www.google.it/analytics . Once you have indicated the site you intend to monitor and the procedure is completed, Google will provide you with a code: this must be copied and pasted in a specific point of your site, the header . From the WordPress control panel go to Appearance> Editor : look for the header.php file in the right column and open it. Paste the code provided by Google Analytics just before the tag at the end of the document.
Alternatively, you can enable Google Analytics via a plugin.
Just wait a few hours before Google records visits to your site. You can always keep an eye on them by logging into your Analytics account.
Would you like to know more? Read my guide to Google Analytics!
Publication: make the site visible to all
The process of creating a site with WordPress is almost done. Now, one of the parts that is often forgotten: inviting Google to index the site.
Go to Settings> Reading , uncheck “Discourage search engines from indexing this site” . Disable (if you have installed it) the Coming Soon plugin, and that’s it: your site is visible to everyone and soon (a matter of hours) it will be indexed by Google!
Do you have clarifications, criticisms or additions to submit to me? Leave a comment! If you found reading this guide on how to create a site with WordPress interesting and useful, rate the article!
If you need a website developer with WordPress for a professional project, contact me now and without obligation!

