


How to Use Google Fonts in a WordPress Theme – Google Fonts is a free source of fonts provided by Google and can be used by web designers to meet their font needs for their website. Currently, Google Fonts already has around 848 font families with various categories.
As a WordPress user, you can also take advantage of this Google Fonts to beautify your writing because there are lots of good and free fonts for you to use. Some new WordPress users may still not know how to add Google Web fonts to a WordPress Theme. So in this article, I will show you how to use Google Web Fonts in a WordPress Theme . Here I will provide two easy ways to add Google fonts on a WordPress site manually and using a plugin.
1. How to Use Google Fonts in a WordPress Theme
Before installing Google fonts on your WordPress Theme, the first thing you need to do is find a font that you like in the Google web fonts library here ⇒ Google Fonts .
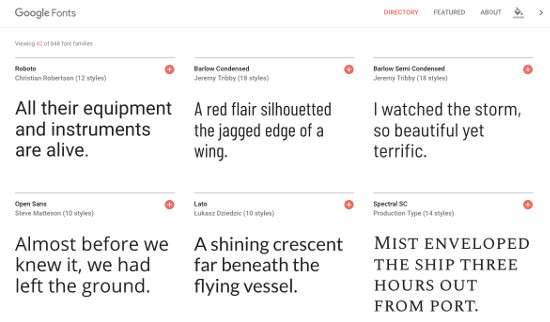
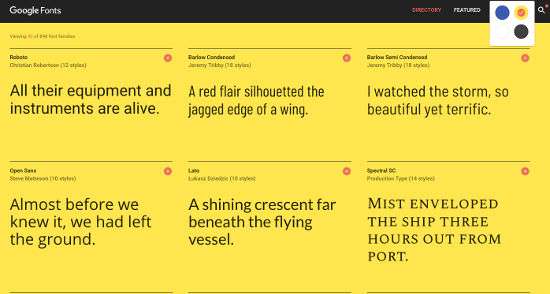
After you visit Google Fonts, you will see a simple white website page with a large list of available fonts, you can also easily change the color of the site to see how the font is displayed by selecting the background color in the menu with the spilled paint icon.
To search for fonts, you can search for fonts by scrolling your mouse or if you already have the name of the font you want to search, please click the search icon on the top right by typing in the name of the font you want to search for.
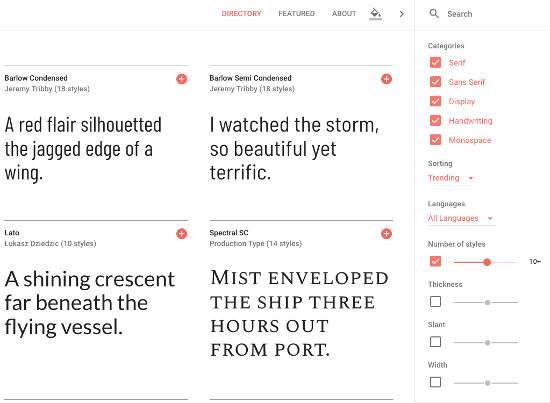
In the search feature that looks like the image above, you will see several options to make it easier to search for fonts, because there are several different types of fonts provided by Google for various needs. You can filter fonts based on categories and characteristics.
Categories include:
- Serif
- Sans-Serif
- Display
- Handwriting
- Monospace
Its characteristics include:
- Bold
- Thickness
- Slant
- Width
You can also narrow the script type according to language, this is helpful for translation purposes and for alternative stylings.
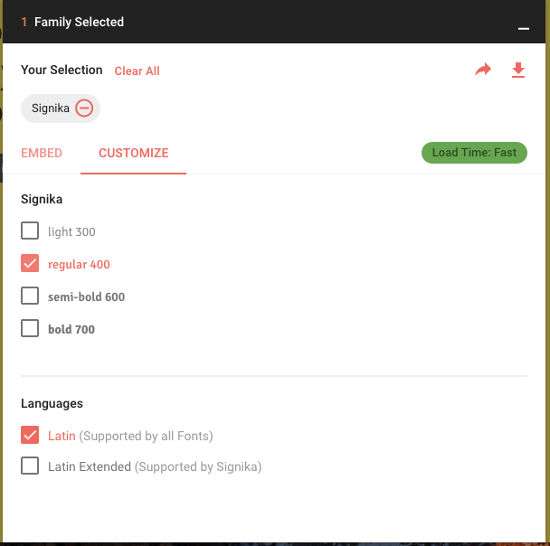
In the example in this article I will choose a font with the name “Signika”, if you have found the font, click on the plus ” (+)” icon.
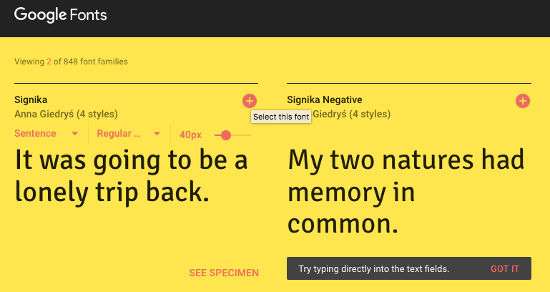
After you click the plus “(+)” button, you will see a popup displayed with two menu tabs “Embed” and “Customize”. Please open the “Customize” tab to choose whatever font size you want to use. In this “Signika” font, there are 4 font thicknesses (light, regular, semi bold and bold).
After you select the thickness of the font on the Customize tab, feel free to go back to the “Embed” tab and copy the font code. There are two choices of embed font code, namely Standard and Import.
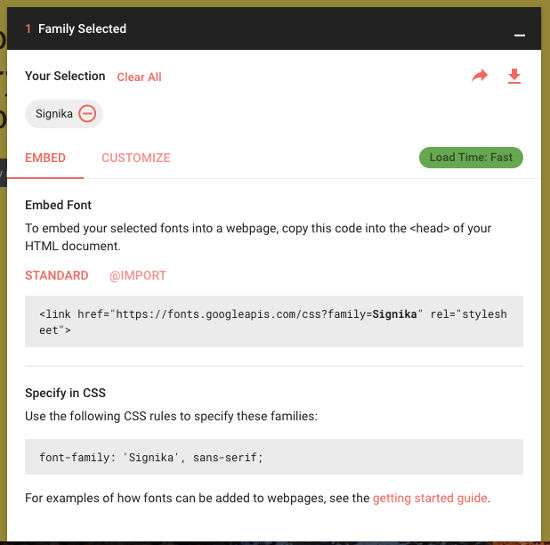
If you use the “Standard” embed code option, please copy the code and put it in the header.php file in the WordPress theme you are using, paste the font code after the tag.
If you use the embed code “@import” please copy the code and put it in the Styles.CSS file, and put it at the top.
Both files (header.php and styles.css) can all be found in the theme folder that you are using or can be found in the Appearance »Editor menu.
Using Google Fonts in WordPress Themes
After you have finished adding the embed font code in your WordPress theme, now you have to add the CSS code to use the font so that it can be used on your WordPress site. You can see the CSS font code at the bottom of the Embed code under “Specify in CSS”.
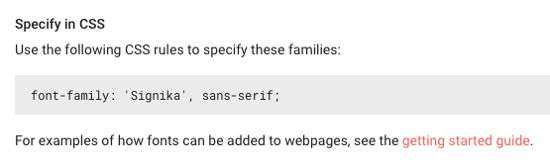
Please copy the CSS font code and open your styles.css file in the WordPress theme you are currently using. And look for the line of code for which font you want to replace with the new font from Google for that font.
If you have, feel free to save your changes and see the font changes on your WordPress site that already use fonts from Google Fonts. If there hasn’t been any change, feel free to clear the cache on the browser you are using and also clear the cache in WordPress if you are using a caching plugin .
2. How to Use Google Fonts in WordPress with a Plugin
This second method is certainly very easy and you don’t need to be related to WordPress coding. This method is highly recommended for beginners because if it is not correct to install the plugin in the header.php or styles.css file it can cause the site to experience problems or even mess up the appearance of your WordPress site.
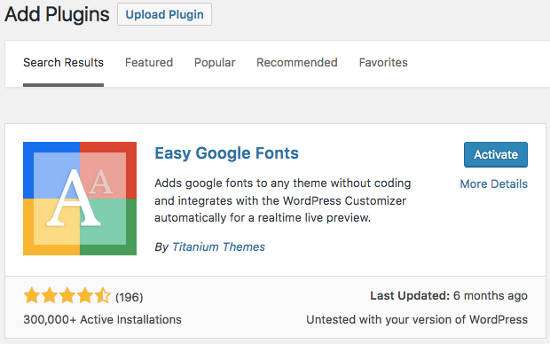
The plugin that I will use in this example is Easy Google Fonts which you can install for free via your WordPress dashboard because the plugin is in the WordPress plugin library.
After installing and activating the plugin, you can go to the Settings »Google Fonts area to create controls on Google fonts by entering the CSS Selector list.

However, if you do not understand this part, you can go directly to the Appearance »Customize menu and select” Typography “. In this section you can customize various sections with fonts from Google’s font list such as Heading 1-5, choose font categories, characteristics of fonts and many more things you can do with this plugin.

If you have adjusted all the font settings with Google fonts in the Customize section you can save these settings and click the “Publish” button. And now you can see the changes that you have made, in this customize you can see every change that you have made live.
Above is how to use Google fonts in a WordPress theme. Hopefully this article was useful for you and good luck. 🙂

