


Tutorial to Create an Online Store with WordPress # 4 – This article is a continuation of the third part of the tutorial to create an online store with WordPress using WooCommerce and this is the last part. After previously in the third section discussing the WooCommerce settings, let’s continue with the tutorial on how to create, add and manage products in a WooCommerce online store.
Adding & Managing New Products
Categories
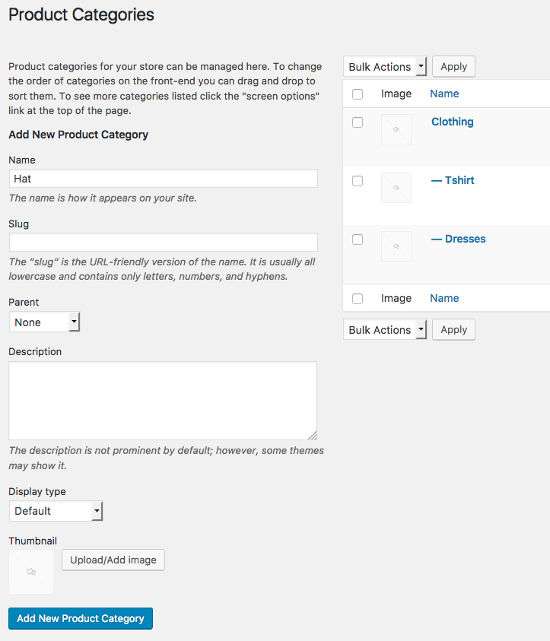
To add and manage your products on WooCommerce there is a new menu in your WordPress admin sidebar called “Products”. To get started with setting up your WooCommerce online store products, first create a category for your products. please access the Products »Categories menu. Fill in the “Name” category according to your product category for example “Tshirt”.
Products
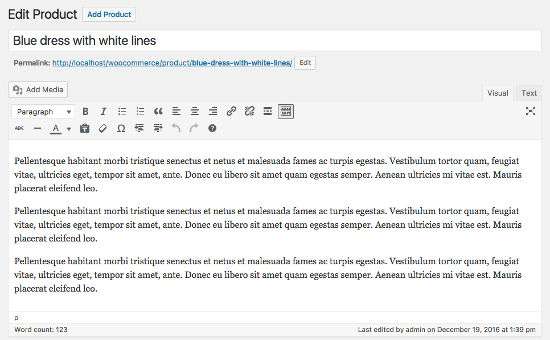
Create a new product by clicking Products »Add New menu, create a title and a short description for your product.
Product data
Under the product editor area there are product settings, you can choose whether the type of product you sell, whether the product is “virtual” (checking this option will remove the “Shipping” tab) and if you select the “download” (digital) option there will be a new column. to upload your files.
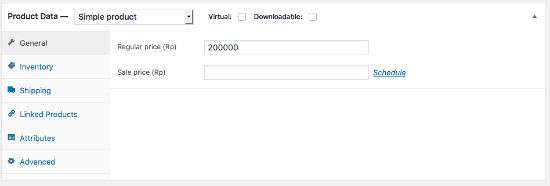
Tab “General” to enter the product price, enter the price in the regular price section. If you are having a “Sale”, please enter the sale price in the sale price section and set the sale schedule from to the end.
If you sell digital products, then you also have to upload files to be purchased, adjust the download limit (leave blank to mark it as unlimited), download expiration (leave blank to remain permanently available), and file type (standard / application / music). The file type you choose affects the schema.org markup for the product.
The “Inventory” tab you can customize options for managing your stock or inventory by entering in product quantity, stock status (in / out of stock), and if you wish to allow backorders. Additionally, you can mark products that are sold as individually, which means that only one can be purchased at a single order. This is also where you can enter a SKU (identification number) if you have one.
The “Linked Products” tab allows you to add upsells, cross-sells, and product groupings.
The “Attributes” tab allows you to enter specific product attributes (eg trusted, never broken, color, size etc.) which will be displayed under the Other Information tab at the front of the product page.
The “Advanced” tab allows you to enter custom purchase records, give product orders menu, and enable / disable reviews.
Product Short Description
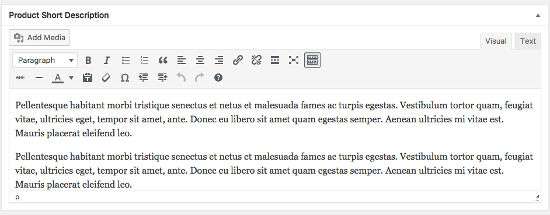
This section allows you to display a short description for your product, this short description will usually be displayed next to the product image and under your product title.
After you have done all of the above, don’t forget to select a category and fill in the tags according to your product. And add an image in the “Featured Image”, if your image is more than one, please enter the image in the “Product Gallery”.
To see a list of your products, you can see in the menu “Products”, all your products are displayed in this section and you can add, edit, or delete products through this section.
Attributes
If you sell a product that includes a choice of colors or sizes such as (M, L, XL) then you can fill in the Attributes section of this. You can add various attributes in the Product »Attributes menu.
Now you have finished adding your product and it’s time to set the theme so that it will appear properly according to the demo.
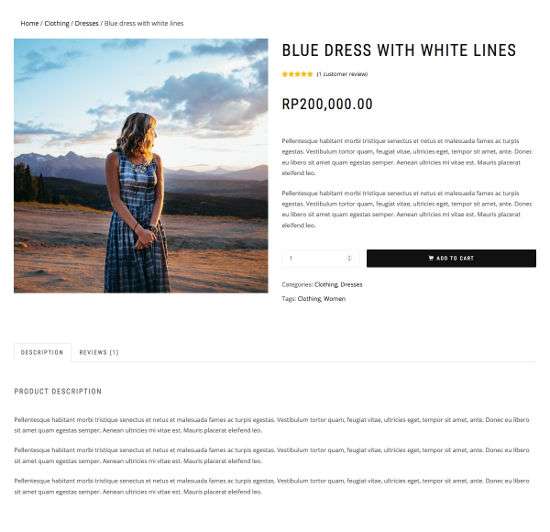
And here is a preview of the product we just created:
Customizing Themes
The first thing you should do is to make your online store look like what is shown in the demo, and most of this applies to other WordPress themes for WooCommerce. Please create a new page called “Home” in Pages »Add New. Please type the title with “Home” and leave the description blank, and most importantly the “Pages Attributes” section select “Frontpage” in the Templates section.
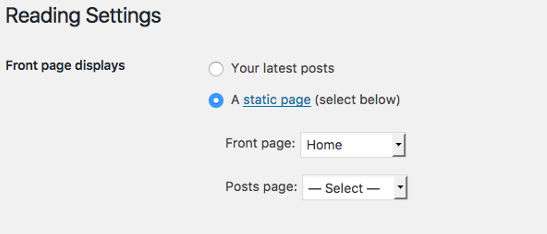
After creating the Home page is complete, please enter the Settings »Reading menu, in the” Front Page Display “section select” Static Page “and the front page point to the” Home “page. Don’t forget to click Save Changes.
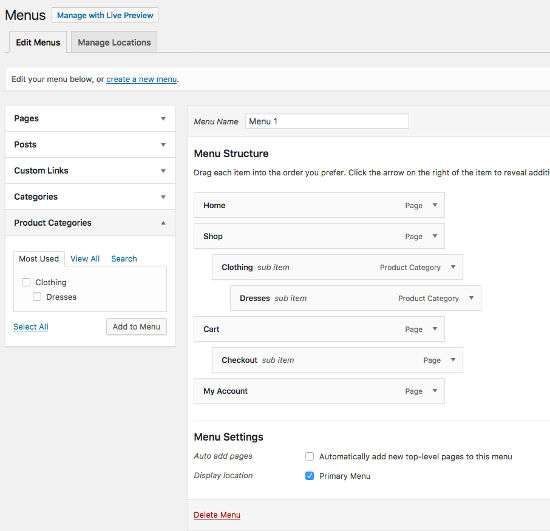
Switch to the menu settings, please go to Appearance »Menus and Enter the Page” Home “into the menu section and check the” Primary Menu “option and to make the product category a menu, you must display the” Products Category “first by checking the Product Category option in the section menu “Screen Options” on the top right. When finished click Save Menu.
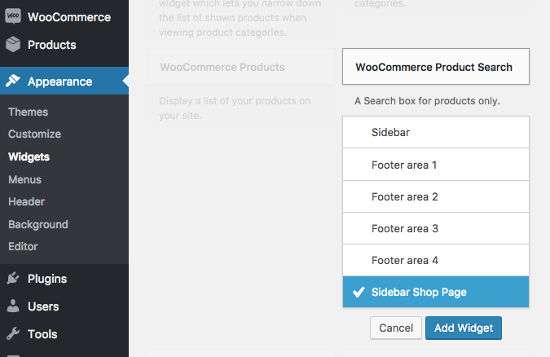
WooCommerce “Widgets” brings several Widgets that you can add to the sidebar of your online store. The WooCommerce widgets include (WooCommerce Cart, WooCommerce Rating, WooCommerce Product Search, WooCommerce Category Product, WooCommerce Reviews and many more), Please enter some Widgets that you want to display in the sidebar area provided.
To adjust the theme layout such as changing the background, site identity etc., you can set it in the Appearance »Customizes section.
WooCommerce Hosting
Hosting plays an important role for the success of your online business, especially for businesses to sell products and with online shop media. To make it easier for visitors to transact, your online shop site speed must be very good if you don’t want to lose your customers. In addition, there are currently so many online stores that you can find on the internet, if you want to compete with other online stores, besides offering better products, you must also have a site that is fast to access, because the speed of your website is very influential. on SEO and search result ranking in search engines.
WooCommerce is sometimes known to slow down your WordPress site, especially if you are selling a lot of products then your online store site will feel heavy when accessed. But you can overcome this by using the right hosting. You can use dedicated hosting to handle online stores built with WooCommerce. BlueHost has a hosting package for WooCommerce hosting, of course this will make your site access faster because the hosting is specifically designed to run WooCommerce. Indeed WooCommerce hosting at bluehost is offered at a fairly expensive price, starting at $ 12.99 / month, but if your product is not that many and just starting out you can try using a shared hosting package at a low price of $ 3.45 / month or a cloud hosting package of $ 6.99 / month and if your online store is growing well you can switch to using WooCommerce hosting at bluehost.
WooCommerce Hosting Features
- WooCommerce Installed
- E-Commerce Positive SSL
- Ecommerce Security
- Dedicated Support Line
- Website Space 100 GB
- Bandwidth Unmentered
- Dedicated IP 1
- FREE Included Domains 1
- Parked Domains 1
- Sub Domains 5
- Email Accounts 5
- Email Storage 100 MB / Account
- Digital Marketing Offers $ 100
The above are some of the features you will get if you use WooCommerce hosting at BlueHost.
And that’s the guide on how to create an online store on WordPress with WooCommerce which I have discussed in full. You can follow this guide from the first to the last part so that you can create your own online store to run your online sales business. Good luck and good luck with your Woocommerce online shop. 🙂

