


Tutorial Guide to Using All In One SEO WordPress . For those of you WordPress users will be spoiled by the many free SEO plugins that you can choose to use in the SEO optimization of your WordPress website. However, of the many SEO plugins in the WordPress library, you will find two of the most popular and most used SEO plugins by WordPress users around the world, the two SEO plugins are All in One SEO and SEO by Yoast. Indeed, both plugins have premium versions, but for me the free version of both is more than enough to make your site more SEO friendly.

As in the title of this article, I will specifically discuss the complete guide on how to install and setup the All In One SEO plugin because in another article I have also discussed in full how to install and setup SEO by Yoast . For beginner bloggers, configuring the All in One SEO plugin can be very complicated, and without configuring the plugin you can’t get more from this plugin.
Read: How to Migrate From All In One SEO Plugin to Yoast SEO
All in One SEO is a plugin that has simpler settings than competing plugins SEO by Yoast. For those of you who don’t like hassle, this plugin will be right for you. And this plugin has an integrated settings page so that you will easily follow this tutorial.
WordPress has been created as a search engine friendly platform and is optimized for SEO by default, but apart from the default settings, there are a lot of settings we need to make to make it more robust for search engines. Here is a complete configuration guide for the All in One SEO WordPress Plugin, which will help your blog be more SEO friendly.
How to Use and Configure All in One SEO WordPress
To use the All in One SEO Pack plugin, you must install and activate the plugin. You can see the Complete Guide to Installing a WordPress Plugin if you don’t know how to install a plugin on WordPress. After your plugin is activated, you will see a new menu called “All in One SEO” on your WordPress admin sidebar and click “General Settings”.
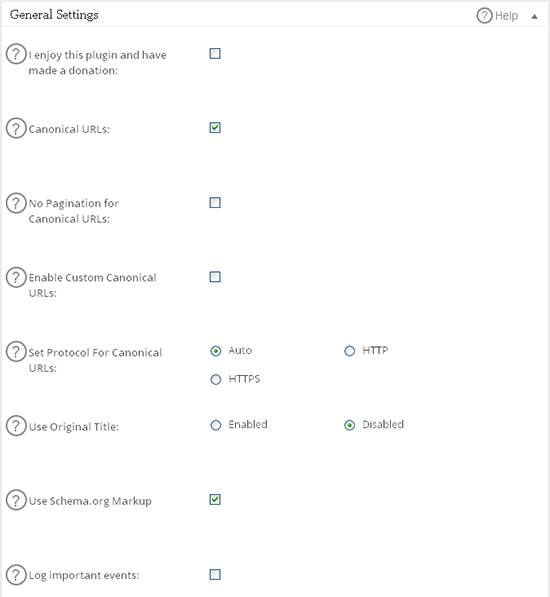
In General Settings, you can see the settings as shown above, where I checked “Canonical URL”, “Use Original Title” and “Use Schema.org Markup”.
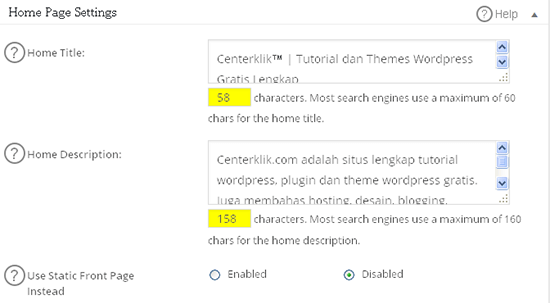
In the “Homepage Settings”, you need to fill in some details such as the Home Title and Home Descriptions. Here are some explanations of what to fill in.
Home Title: Fill in the name of your blog along with the keyword or tag line, in this column you are advised to fill in a maximum of 60 characters for better results. (Example: Center, click Complete Free WordPress Themes and Tutorials).
Home Descriptions: In this column you fill in the description of your blog, you are advised to fill in no more than 160 karaket. Make your description meaningful, informative and have a rich keyword (keyword).
Home Keywords: In this setting in the screenshot above it is not visible because I did not activate it, because search engines do not depend on Meta Keywords anymore, so you can ignore this field, but if you prefer to use these keywords you can fill them with your keywords. aim.

You can follow the “Title Settings” settings as shown in the image. Or you can delete the % blog_title% format in the Post Title Format section.
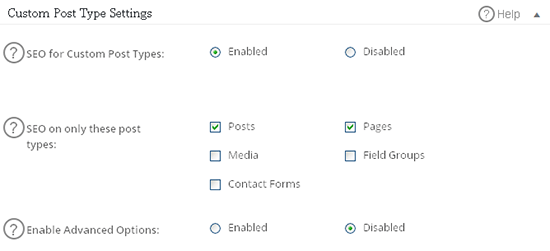
And below are the settings that you should adjust for the “Custom Post Type Settings”:
and settings in the “Display Settings”, you can adjust as shown above.
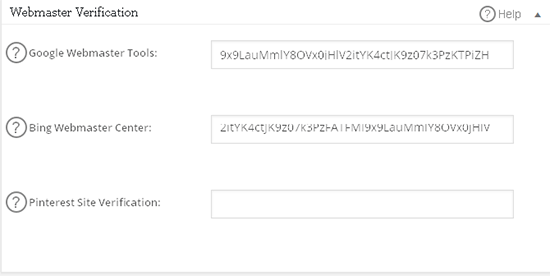
Webmaster Verifications: this section is useful for verifying your WordPress blog with Google Webmaster Tools, Bing Webmaster Tools and Pinterest. All you need to do is, register your site with all three sites, and take the verification key, and paste it in that section. You don’t need to fill in everything if you only register your site on the Google and Bing search engines.
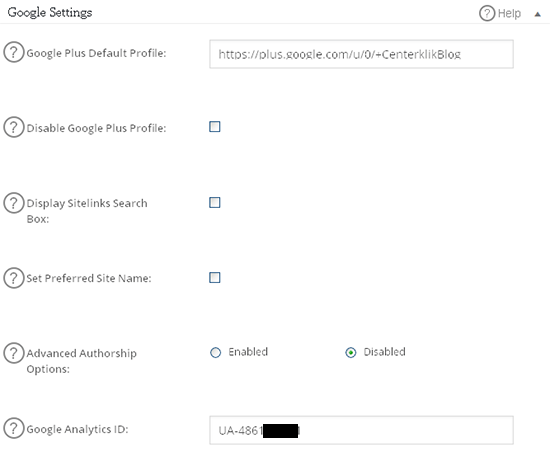
Google Settings: The All in One SEO plugin supports Google Authorship. This will work great when you are running a single author WordPress blog. Just add your Google plus profile URL, and on your Google plus profile add a link to your blog too. In this setting you can also enter a Google Analytics ID which is useful for enabling Google Analytics tracking for your blog.

The “noindex settings” setting is where one of the most important settings, because you don’t want your archive pages to be indexed on Google. Note that archive pages are used for user experience and for navigation of your site. When indexed on search engines, archive pages work as low quality pages. So, it is recommended that in this setting you select noindex all archive pages.
At the bottom there is a setting “Advance Settings”, uncheck the option “Auto Description Generated,” That way you can write Meta Descriptions according to your own wishes which can produce a better CTR.
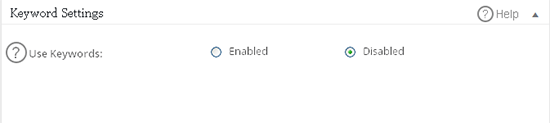
The last setting is “Keyword Settings” (Keywords), and as I explained above that now search engines do not depend on Meta Keywords, in this setting they prefer to disable (disabled).
And after you have done the settings, then click “Update Options”, and you are ready to use the All in One SEO Pack plugin.
How to Setup All in One SEO on Posts and Pages
There are two options in the Post and Page settings if you disable Keyword settings in this configuration, but if you choose to enable Keyword Settings there will be three choices. In this section is the information that will be displayed in search results on search engines:
Meta Title
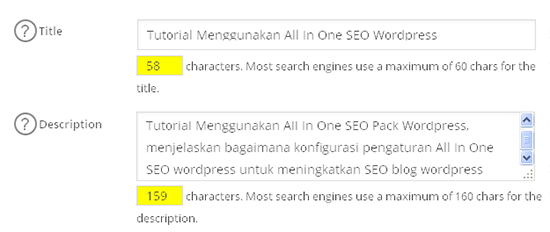
You can fill in the title of your article, make sure the keywords you are aiming for are also included in this section. When you write a post, there is a difference between how you want search engines to see your post and how you want your readers to see the post title. This option gives you the freedom to make your post title search friendly for search engines as well as for your visitors as well. And make sure the Title is no more than 60 Characters.
Meta Descriptions
Meta description is one of the most important parts of SEO optimization. The meta description is the quoted information that will be displayed in the search results of your page. You can enter a keyword rich description, and if you don’t fill in this section the plugin will automatically take the 160 words at the beginning of the paragraph as the description. I suggest you write less than 160 characters for the meta description, which should also include your target keywords.
Keywords
You can leave this section blank or disable this setting, because as I said earlier, Google doesn’t use Meta Keywords or meta keywords to find your articles in search results. But, if you keep filling it that’s okay, because this is used to optimize your articles later.
Feature Manager
In All in One SEO there is also a Feature Manager menu which contains very useful Add Ons such as: XML Sitemaps , Social Meta, Robots.txt, File Editor, Importer and Exporter, Bad Bot Blocker, Performance and the last one is Video Sitemaps (Only for the Pro version).
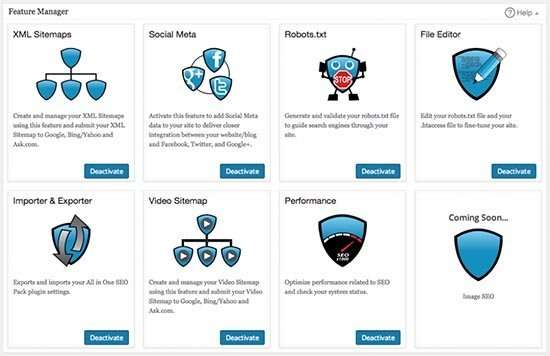
The features above are the same as the additional features brought by SEO by Yoast, by activating these features you will get extra benefits such as XML sitemaps, by activating these Add Ons you no longer need to install the Google XML Sitemaps plugin. File Editor functions to edit htaccess files without the need to enter your cpanel hosting and many others. To use it you only need to press the “Activate” button and to deactivate you only need to press the button again which changes to “Deactive”.
Above is a tutorial using the All in one SEO Pack in WordPress that you can follow so that the SEO optimization of your WordPress website can be maximized and get better rankings in search engines. Please try and hope it is useful. 🙂

