


The Complete Guide on How to Disable WordPress Comments Columns – Comments have many benefits for blogs, there are many reasons why blogs should have comment fields enabled. Comments can turn monologues into discussions and build community. Apart from that, comments can also give a little boost to SEO as an index for search engines.
So, what is the reason you want to disable comments in WordPress?
Most of the comments only contain a promotion, spam, backlink seekers and sometimes contain racist words. Even more than that, with the comments column it can also waste your productive time because you have to reply to comments and sort out which comments need to be published or put in the spam or trash column.
But it is also true that posts that do not contain comments feel incomplete and unattractive, therefore many blogs leave a comment column.
Good and bad reasons for disabling comments in WordPress
Some popular websites often receive a lot of comments. They have addressed the issue of comment volume by redirecting comments to social platforms or third party comment only platforms. It can help you too and in many ways – controversial comments are taken off your blog and don’t have an immediate impact. What’s more, social media is also self-regulating and can reduce inappropriate comments on its own.
Another reason to disable comments can increase your blog’s load times. Don’t forget that every comment requires a new request and database space which will impact your blog’s load times. But for this problem there are many solutions to solve it. So, you don’t have to worry about the load time of your blog because of enabling the comments column.
Read: How to Add GDPR Checkbox in WordPress Contact Form and Comments .
Disabling WordPress Comments With Built-in Features
By default, WordPress allows comments on all posts, and disables comments on all pages. You can change this to completely disable or enable comments (all sections of the site), or selectively vote on certain posts and pages. You can manage comments in several ways on the Settings or ‘Settings’ page.
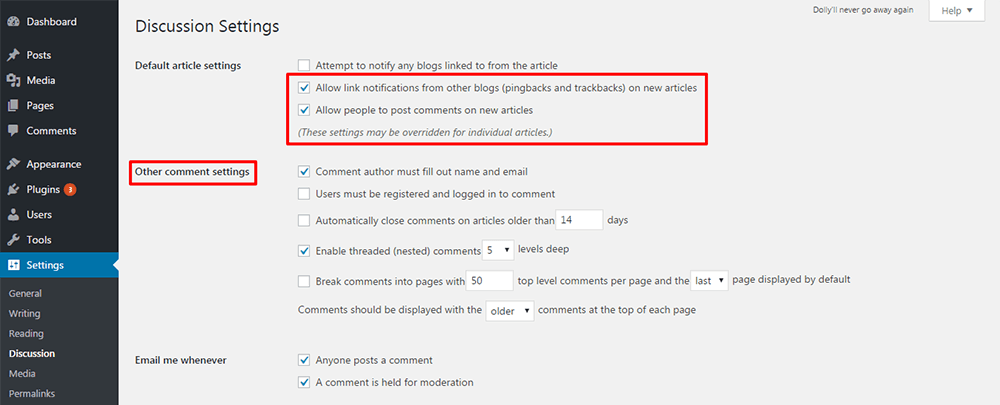
To start managing comments, go to Settings »Discussion on your WordPress Dashboard.
1. Disable comments on all new posts (and pages)
Uncheck the option ” allow people to post comments on articles “. You can also disable pingbacks and trackbacks here. This will stop commenting and pinging all posts on your site completely. (Pages are disabled by default).
If you wish to allow comments on individual posts or articles, you can do this by changing the setting under ‘Discussion’ on each post or page. (Read more below).
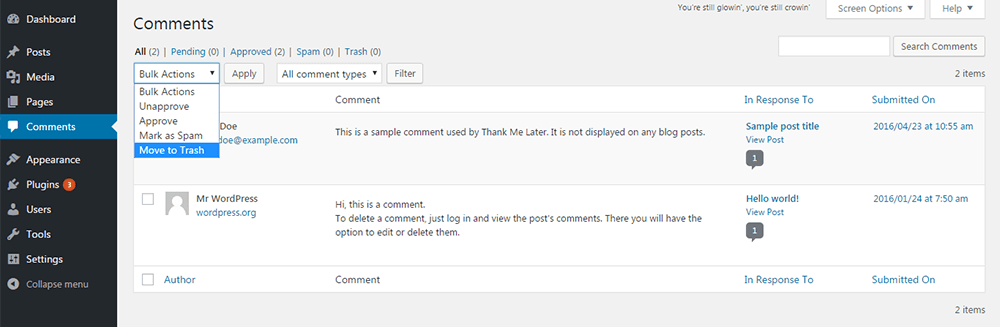
2. Disable comments on all posts (or pages) that are published
Simply disabling comments like method number 1 will not stop the flow of comments on preexisting posts and pages. To remove all comments on all existing posts, visit Dashboard »Comments .
Here, you can select the comments you want, click on ‘Bulk Actions’, select “Move to Trush”, then click the ‘Apply’ button.
3. Disable comments on the selected post (or page)
This time let’s go to the ‘All Posts’ section. Select all the posts for which you want to delete comments. Then click on ‘ Bulk Actions »Edit» Apply’ . A new option, Bulk Editing will open where you can select the ‘ Do Not Allow ‘ option for comments.
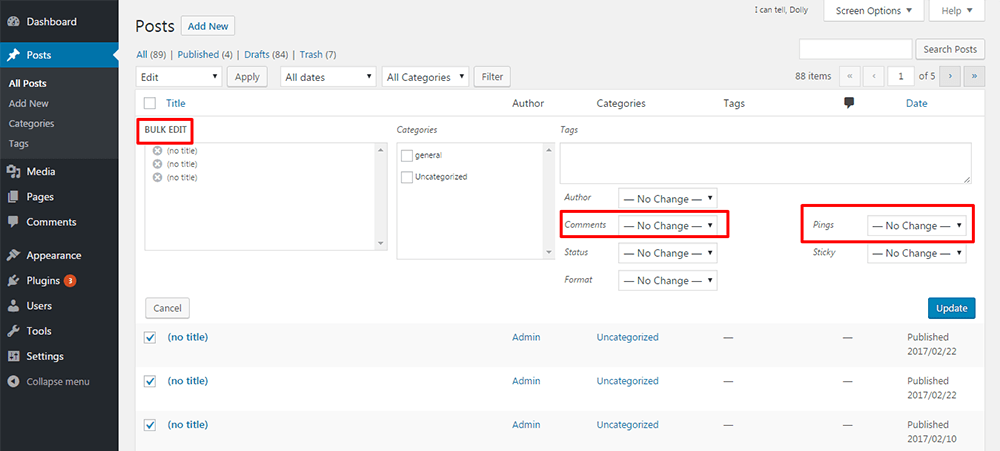
You will be limited to choosing from 20 posts at a time as that is the default setting for post display on the ‘All Posts’ screen. To show a bigger number on each screen, make changes under ‘Screen Options’.
4. Disable comments on existing posts individually
Select a specific post from ‘All Posts’ and click ‘Edit Post’. Below the writing area, you will see the title ‘Discussion’. If you can’t see this option, activate “Discussion” in the “Screen Options” menu. In the ‘Discussion’ box, uncheck ” Allow comments “.
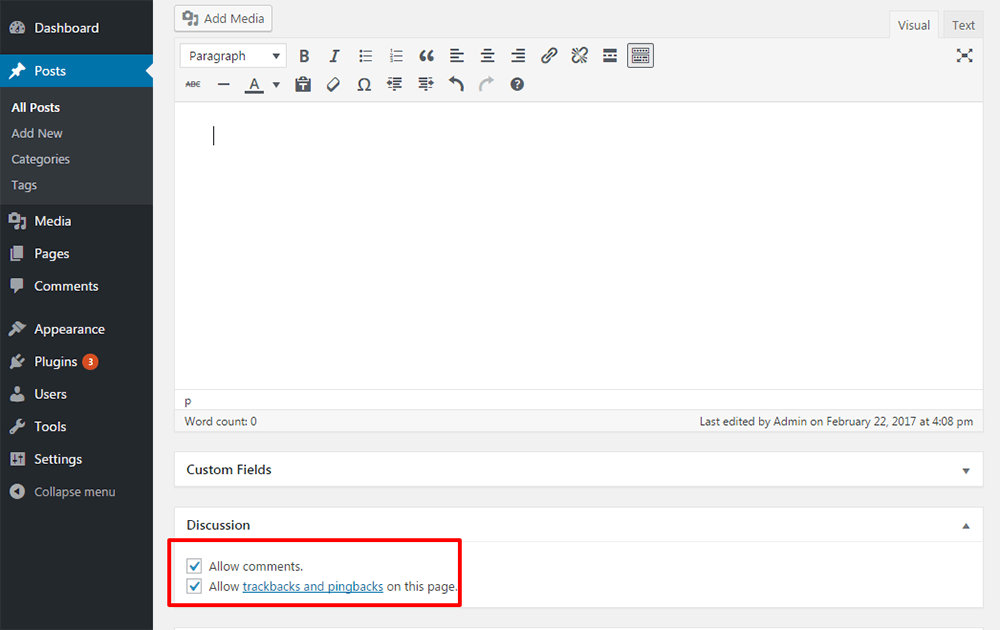
You can also achieve the same result by selecting ‘Quick Edit’ on each post quickly.
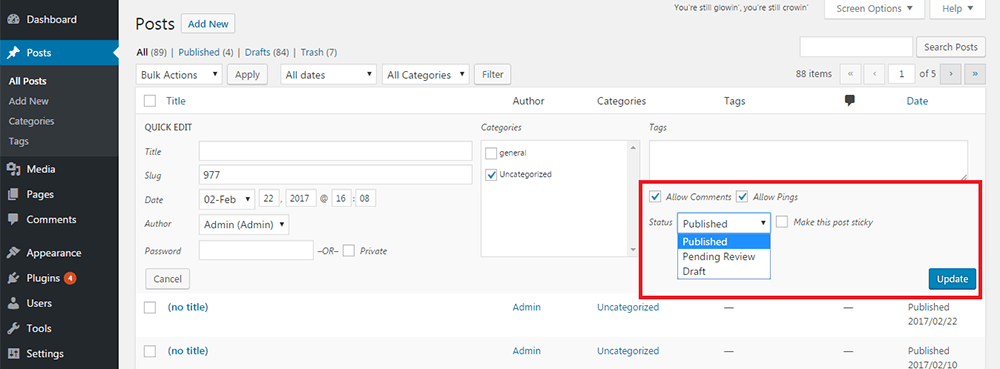
5. Disable comments on media files
Media files such as images can still receive comments even though the post has been deactivated.
When you upload an image to your post, an attached file is created. This file will continue to receive comments, even if you have disabled them in the associated post. To disable comments in WordPress for these attachments, visit the ‘Media’ section, select a media file and click ‘Edit’.
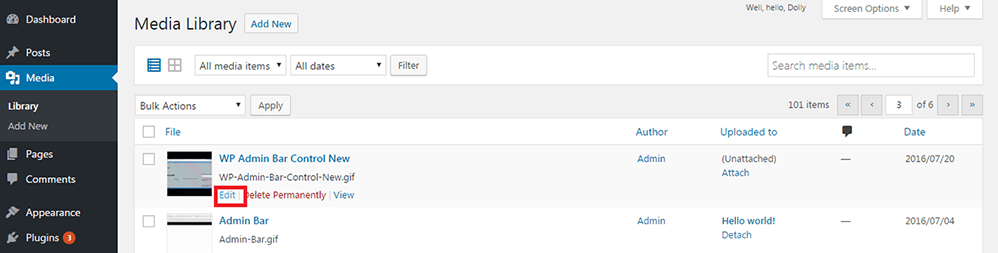
You’ll find a “Discussion” box similar to the one in the text editor for posts, and you can disable comments there.
It’s not possible to do bulk edits to media files using settings in WordPress, but you can do it by adding some code to your theme files.
6. Apart from disabling comments, you can also get more control over comments by adjusting items in Settings »Discussion .
Let’s take a quick look at the options available:
- Requiring moderator to approve the comment before it is published : This not only catches bots and spam, but also helps prevent comments from appearing right on the front of your site. It will appear on your dashboard in the comments queue where you need to moderate it.
- Blacklisting IP addresses, usernames or emails : Blacklists that are known to offenders, and some even on the list will be blocked. You can also add a bit of code to your .htaccess to block known malicious IPs.
- Requiring the user to register : Can decrease both spam and comment volume.
- Approving comment authors : Save time by approving comment authors. Subsequent comments will be easily skipped.
- Closing comments on older articles : Specify the number of days after which comments will be stopped. Spammers generally target older posts, so closing comments will reduce spam.
- Limiting links : This can frustrate spammers who want to leave as many links as possible with their comments.
- Be notified when you receive comments : If you stay up to date with new comments, you can act quickly on unwanted ones.
Disabling WordPress Comments With Plugins
By setting a manual WordPress setting to disable the comments column like the way above, you can also use a plugin to make your job easier and give you “more control” over comments, making it more time-saving and easier, you can use a free plugin called ‘Disable. Comments’, where this plugin is very popular and always gets updates.

Here’s how to use it:
1. Download the Disable Comments plugins, please download here .
2. Install and Activate
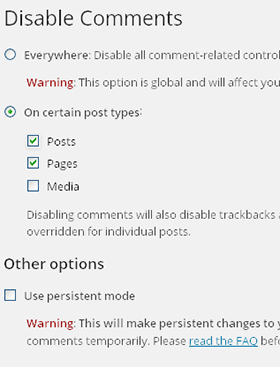
3. Click the Settings menu »Disable Comments , and configure it as shown below, and click the ‘Save’ button when done.
 Explanation:
Everywhere : Used to close all comments in WordPress both on posts and pages and even media files as a whole.
On Certain Post Type : We recommend that you choose this, because you can choose to close the entire comment column in the Post, or only the entire Page or Media File.
And those are some of the ways to disable the comment column in WordPress, you can choose which method is suitable for you to apply and I hope this article is useful for you. Good luck 🙂
