


How to Install and Configure W3 Total Cache WordPress. WordPress is one of the most powerful, flexible and most popular platforms for creating websites. Many features can be added to WordPress by using plugins. But there are also many WordPress functions that make WordPress load heavy.
Actually the WordPress platform has been developed into a platform that has fast loading, but if the website or blog is growing, it will still cause problems in loading loads. There are several ways we can solve speed problems in WordPress, and they are very easy. Actually it is enough to apply 3 ways all problems can be resolved, namely by using the best hosting service , doing image optimization and the last thing I will discuss in this article is using a caching plugin.
Among all the caching WordPress plugins, W3 Total Cache is the most popular free cache plugin choice. W3 Total Cache has more than one million active installs and many good ratings about this plugin, and you should give this plugin a try. In this post, I will show you how to install and use W3 Total Cache to improve the performance of your website so that it is faster.
Here are some excellent features of W3 Total Cache:
- Compatible with shared hosting , virtual private / dedicated servers and dedicated servers / clusters
- Transparent content delivery network (CDN) management with Media Library, theme files and WordPress itself
- Mobile support: respective caching of pages by referrer or groups of user agents including theme switching for groups of referrers or user agents
- Caching of (minified and compressed) pages and posts in memory or on disk or on CDN (mirror only)
- Caching of (minified and compressed) CSS and JavaScript in memory, on disk or on CDN
- Caching of feeds (site, categories, tags, comments, search results) in memory or on disk or on CDN (mirror only)
- Caching of search results pages (ie URIs with query string variables) in memory or on disk
- Caching of database objects in memory or on disk
- Caching of objects in memory or on disk
- Minification of posts and pages and feeds
- Minification of inline, embedded or 3rd party JavaScript (with automated updates)
- Minification of inline, embedded or 3rd party CSS (with automated updates)
- Browser caching using cache-control, future expire headers and entity tags (ETag) with “cache-busting”
- JavaScript grouping by template (home page, post page etc) with embed location control
- Non-blocking JavaScript embedding
- Import post attachments directly into the Media Library (and CDN)
- WP-CLI support for cache purging, query string updating and more
And after you have seen some of the features and advantages of w3 total cache, now let’s continue for the complete guide on how to install and setup the w3 Total cache plugin below.
How to Install and Configure the W3 Total Cache plugin
First of all, please download and install W3 Total Cache from the WordPress Plugin directory so that you get the latest version of W3 Total Cache and activate the plugin. After you activate the plugin, you will see a notification notification whether you want to activate ” edge mode ” or not, you can click ” Hide this messege ” so that the notification disappears, because if you activate “edge mode” it will open pre-release features which is intended for advanced users.
And after you hide the message, please see the new menu item with the name ‘Performance’ in your Wordrpess dashboard.
Please click the Performance menu -> General Settings to access the configuration section. There, you will see, the page is divided into sections. I will go over each of these settings pages individually. Indeed, this plugin is famous for its many settings pages, different from other cache plugins such as WP Super Cache or WP Rocket premium cache plugin . Want to try WP Rocket ?
General Settings
In this section of the setup, you only have two choices. By selecting the checkbox, you can enable or disable all types of caching at once. And the ‘ Preview mode ‘ feature allows you to test your changes before applying them to your site live.
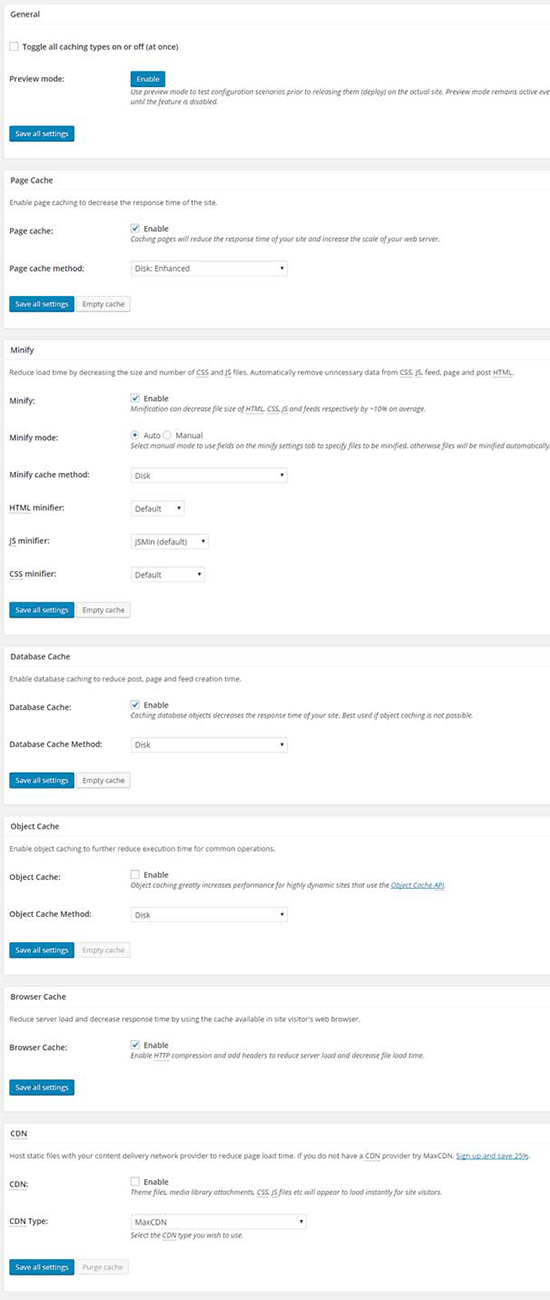
Here are the general settings for the W3 Total Cache Plugin:
- Page Cache : Check the ‘ Enable ‘ box.
- Page Cache Method : Disk Enhanced
- Minify Cache : Enable
- Minify Mode : Auto
- Minify Cache Method : Disk
- Database Cache : Enable
- Database Cache Method : Disk
- Object Cache : Unchecked
- Browser Cach e: To use the feature, check the ‘ Enable ‘ box.
- CDN : Unchecked
- Reverse Proxy : Unchecked
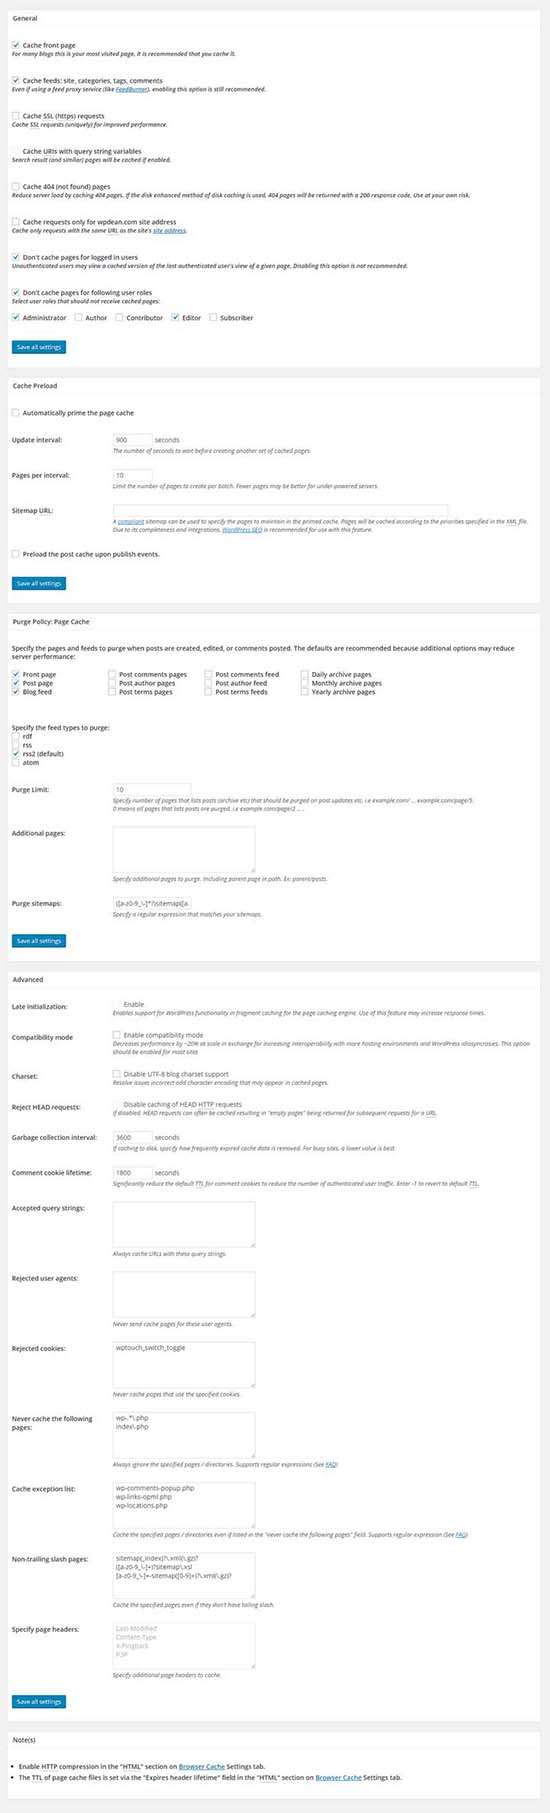
Page Cache Settings
Setting this page cache will create a static version of the dynamic page. If you enable this option, every time a visitor opens a page, a static version of the page will be created. And if at another time the visitor visits the page it will load the static page that has been created and make the page load very fast.
There are many more settings in this section, as shown below:
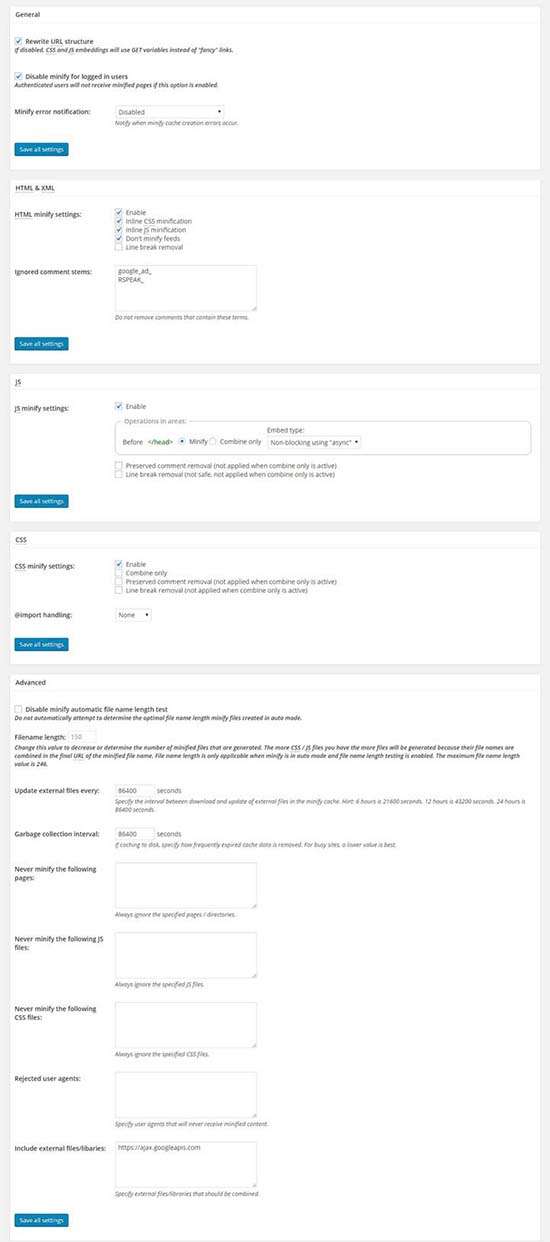
Minify Settings
This will shrink or reduce the file size of your website. However, this process may require more resources than sending the actual files.
While it’s a useful feature, it does sometimes cause problems on multiple hosts. I highly recommend that you contact your hosting service provider first before enabling this option.
Here are the settings for the minify settings if you want to make the settings in this section too:
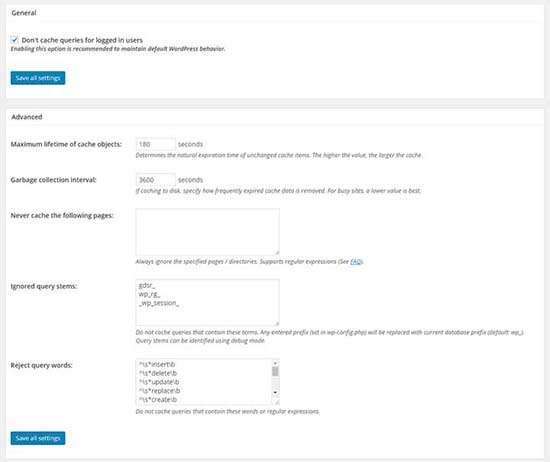
Cache database
This caching method will reduce the load on the server by caching SQL database queries. For larger sites, creating a query and executing it may take some time. Enabling this feature will really help you to speed up data loading.
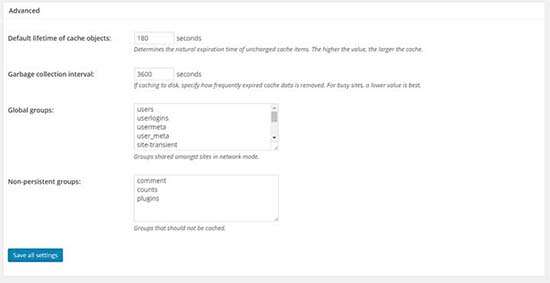
Cache object
This setting should be used if your site is on a dedicated or VPS server, because if you activate this setting on a shared hosting server it will cause your site to even slow down, so it’s best to take this into account carefully if you want to change this part.
Browser Cache
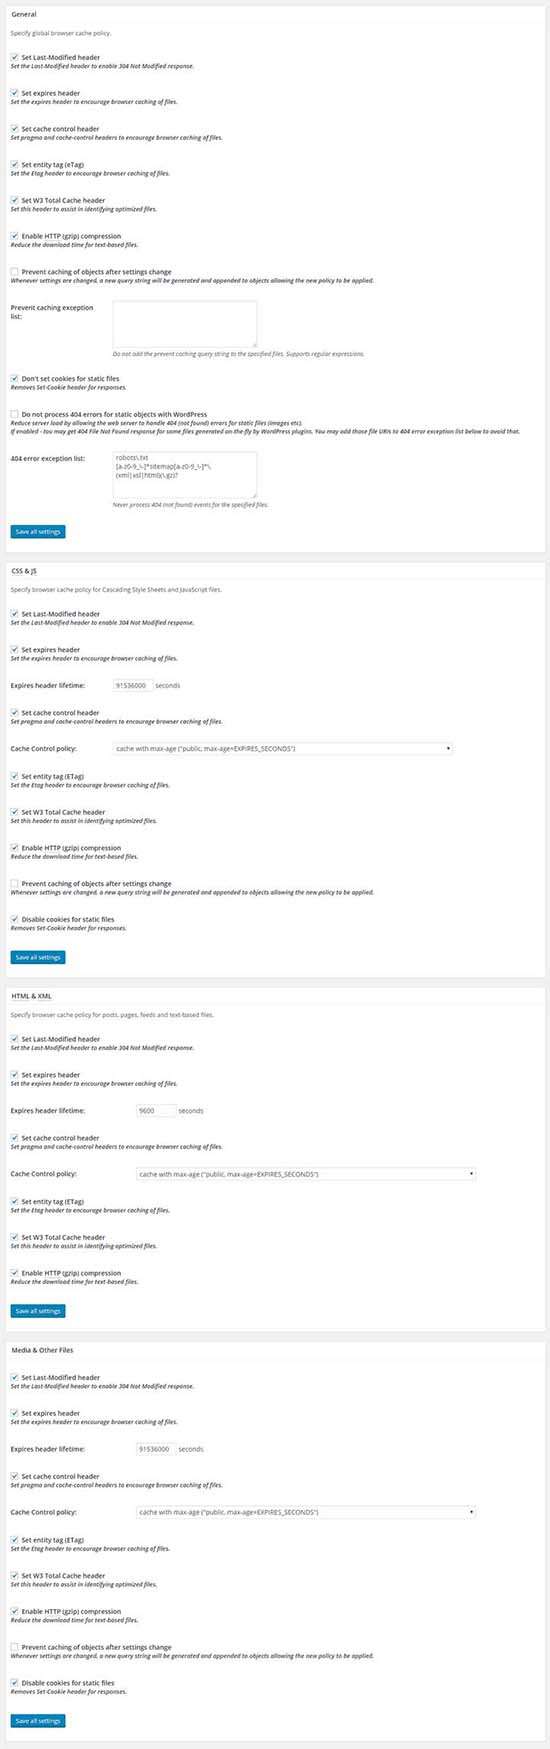
It is highly recommended that this setting be activated, because when a visitor enters your website, the browser will download some images, CSS, JS files, etc. and store them in a temporary folder. And when visitors visit other pages, they don’t need to download these things anymore. However the browser only stores these files for a short time. The Browser Cache feature will extend the durability of these files.
CDN
CDN stands for Content Delivery Network. The CDN service allows you to store frequently used static content on their servers and the files will be distributed from the closest location to visitors. This has three main benefits.
- Reduces the load on your server
- Speed up your website
- Keeps the site active even when a DDOS attack occurs.
W3 Total Cache comes native support for most of the best CDN services such as MaxCDN, Amazon Cloud Front, Rackspace and Amazon S3. The setup process for each CDN provider is different, but each CDN service provider will provide a very complete and easy way to set it up with the W3 Total Cache plugin for you.
Import / Export
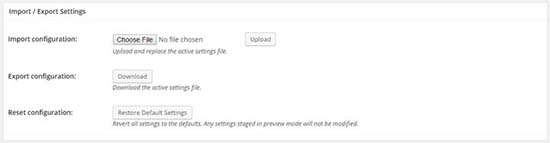
This setting is for you if you have another WordPress site and also use the W3 Total Cache plugin. To shorten the time in plugin setup, you can export these settings and import them on other sites so that the automatic settings match your first site.
Other features
The general settings page also has several other setting options. Since this is not recommended for beginners, I will briefly cover it.
First of all, reverse proxies are similar to CDNs. This proxy allows you to cache regular static files on third party servers. As users will access files via cloud or cloud, it will increase page loading speed.
If you are familiar with New Relic, you will find the Monitoring section useful. In this section, you can configure a Relic New account to get details about the performance of your website and server.
The Miscellaneous section covers a wide variety of options. From this section, you can enable Google widget dashboard page speed, enable edge mode, etc.
The Debug section allows you to troubleshoot problems created by plugins. After you enable the feature and select a specific Caching method, the caching information will be added as HTML comments on every page. You can view them from the source page.
Fragment cache is useful if you want to cache not an entire page, but only a fragment on a specific page. And a useful extension for adding third-party services to plugins.
Read: 13 Ways to Speed Up the Loading of a WordPress Blog Website
Above is a complete guide on how to install and setup the W3 Total Cache plugin, please follow the tutorial above so that setting up w3 total cache is more precise and making your WordPress website or blog run well and fast. Good luck 🙂

