


How to start a WordPress blog is not as difficult as it seems, but Blogging can also be very complicated if you don’t know how to get started. But in general, blogging can be done by anyone who has a computer or laptop with an internet connection.
And in this article I will show you how to start a blog with WordPress in just 30 minutes.
This article post is a long one, because I will discuss how to create a WordPress blog from the very beginning of purchasing a domain until your blog site is ready to use. This is a special article that I created for beginners who just want to create a blog with WordPress but don’t know where to start. And let’s start now…! 🙂
Step 1: Get a domain name and web hosting
There are two options for using a domain and hosting:
- Hosts on web based platforms like Blogger and WordPress.com are (Free). ⇒ How to Create a Free Blog with the Latest WordPress
- It runs the platform on self-host (this means you will need to purchase your own domain and web hosting service).
Currently the best and popular blogging platforms are Blogger.com, Tumblr, and WordPress.com, and all three are free to use, but are you sure you want to build your blog on free hosting?
Most professional bloggers always create their blog with a domain name of their own choice and also on their own hosting (not a free blog with a free domain name and hosting). If you are serious about becoming a serious and professional blogger, then you will naturally choose to build your blog with a domain name of your own choosing and hosted on a paid web hosting service.
And here I will only discuss in full how to create a special blog to create a blog with the WordPress platform for Self Hosted.
To start a self-hosted WordPress blog, you’ll need two things:
- A web hosting account (to store your blog content) and,
- A domain name (your blog’s address on the WWW).
How to Get a Domain Name and Hosting
Domain name is the address of your blog, such as facebook.com, twitter.com, and WP Radar.com it is a domain name of your choice. To have a domain name, you can get it at the hosting service provider you want to use.
Web hosting is a place where you will store all your blog content – text, images, videos, and other web files.
My recommendation for novice hosting is to always start small and at a low cost by choosing a shared hosting plan. You can choose one of the best hosting services at iPage , BlueHost , and Siteground or check out 10 other best cheap hosting services .
In this article I will use iPage as an example in this post. I take iPage as an example because this company has a good track record of business with fast business growth and offers very affordable prices, this hosting company is also very similar to Webhostingpad ‘s cheap hosting. Not only that, but because WP Radar.com also uses iPage as its hosting.
To learn more, check out the detailed review of iPage hosting here .
Below I will guide you to the process of ordering hosting and domains on iPage, so that you are easy in the process and don’t take the wrong steps:
1. Order iPage hosting

To get started, visit http://www.ipage.com and wait a few moments for the price to change from $ 3.39 to $ 1.99 / mo as shown above, then click ‘ Sign Up Now ‘ on the homepage. The current price for iPage is just $ 1.99 / mo – which is one of the cheapest hosting services offering among all the other best hosting companies.
2. Enter your domain name
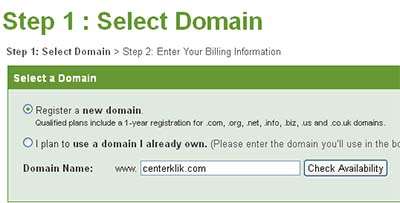
Shortly after you click ” Sign Up Now “, you will be directed to the “Step 1: Choose Domain” page. Select “Register New Domain” if you register a new domain name or don’t have a domain name, it will be free for all iPage customers for the first year, but if you already have your own domain and don’t want the free domain that your iPage gives you, please select ” I plan to use a domain already own “. and enter a domain name that you already own (you can use a domain you purchased elsewhere).
3. Personal info and additional hosting features
Next, you will need to enter your personal information (name, address, email, etc.), credit card information or your paypal account address, and the subscription period (2 years by default) and you can change it to 1 year if you feel 2 years. too expensive.
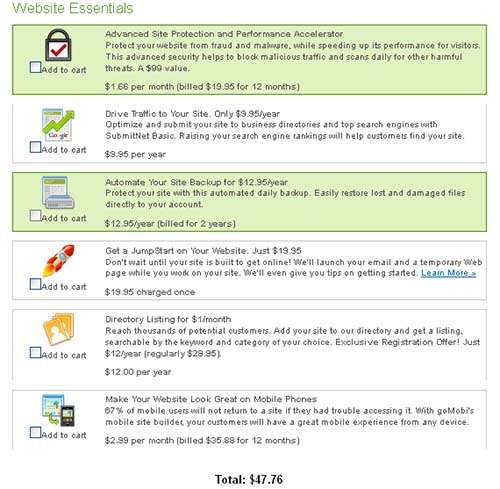
Next, please scroll the mouse down, you will see a number of additional features that will be added to your account. Some of these features are unnecessary or free (for example you can always use W3 Total Cache to improve WordPress performance) so my advice is to uncheck all options. Because by default iPage has checked several features that make the price look expensive, you should really pay attention to this part so that the price you get is what you need.
As soon as you click ” Check Out “, iPage will collect the payment from your credit card or paypal account. Under normal circumstances, if your payment is successful, your hosting account is ready for you to use. You will receive a welcome email with all login details to your account. And you are set to log into your iPage account for the first time to setup your blog.
Step 2: Install WordPress
As I have mentioned above, your iPage account is ready for you to use after making a payment. Now it’s time to login to your Control Panel admin area. In the Admin area or what is often called the Control Panel, you can control all aspects of your hosting account.
There are two ways to install WordPress – the platform on which you will setup your blog.
First: You can do this manually by downloading the file from WordPress.org and uploading it to your web hosting using FTP client software. (read: Complete Guide on How to Use the FTP Client [FileZilla] ).
Second: By using the auto-installation application (one click Install) provided by iPage (This method is faster and easier for beginners).
Both methods are quite simple but for beginners of course using auto install is a good choice. But I will discuss both below.
Install WordPress Manually
You can read the step by step manual wordpress install guide here . At a glance, here are the steps you need to do:
- Download WordPress from the official website WordPress.org
- Upload the file via FTP using Filezilla software (FTP information included in your email)
- Unzip or extract WordPress files
- Create a database for WordPress on your web server, with the option MySQL user has all rights to access and modify.
- Rename the wp-config-sample.php file to wp-config.php.
- Open the wp-config.php file with a text editor (notepad) and fill in your database details.
- Place the WordPress files in the desired folder location on your web server.
- Run the installation script by accessing wp-admin / install.php in your web browser. If you install WordPress in the root directory, you will need to visit: http://namadomain.com/wp-admin/install.php , if you install WordPress in its own subdirectory called blog, for example, you must access it with the address:
- http://namadomain.com/blog/wp-admin/install.php
- And your manual installation of wordpress is complete.
Install WordPress Automatically
If you have trouble with the manual method above, please use the method below, because this is the easiest and fastest way for beginner bloggers. 🙂
The easiest way to setup WordPress on your iPage hosting account is to “auto installer” install it using the built-in iPage app. With the support of iPage’s automatic installation service, this process is only a few mouse clicks away. You can refer to the image below for the installation process.
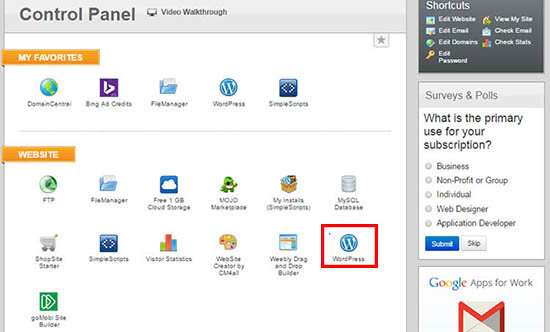
This is part of your iPage control panel, you will see something like this. In the ” Website ” section, there is a WordPress icon on the second line, click the WordPress icon to start the installation.
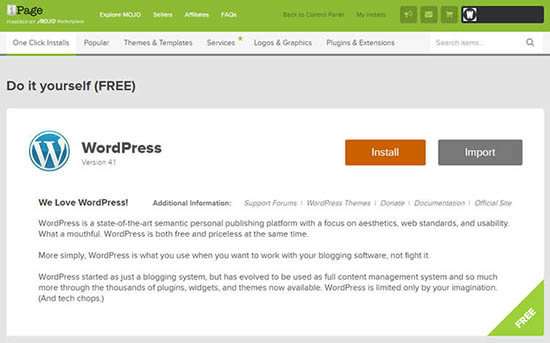
One-click iPage installation is now supported by Mojo Market Place – which can be helpful if you want to buy their product and install it on your WordPress. But for this example, I will only focus on installing the free version of WordPress. Just click ” Install ” when you see a page like the one below (choose your domain for installing WordPress, enter your email address and click finish – that’s all).
Or you can see the full version in the following article: How to Install WordPress on iPage cPanel Hosting
Note that things may look different if you do this (auto-install) on another web host but the process is generally the same. As long as you are using an auto-installation application such as Fantastico or Softaculous or Simple Script, the installation process will take no more than 5 minutes.
Step 3: Write Your First Article
After WordPress is finished installing, you will be given a URL to login to your WordPress administrator page.
In most cases the URL will look like this (depending on where your WordPress installed folder is):
Tip: Bookmark this URL, because you will very often be logged into wp-admin to manage your blog.
Security Tip: It would be better if you change this login URL to another one for security purposes (such as –domain.com/login ). It will be easier if you use a security plugin like iThemes Security .
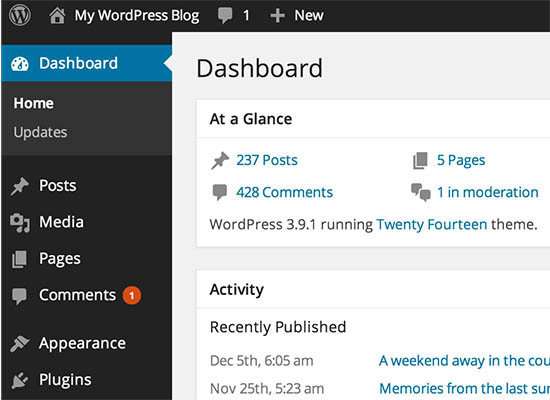
Now, go to this admin URL and login with the username and password that you created earlier (the one you entered when you installed your WordPress previously) and there, you are now in the WordPress Dashboard area. In this WordPress admin area you can set up, write, edit, install themes and plugins, upload images and much more.
Here is the latest WordPress Admin (version 4.1.1) dashboard looks like the picture below and looks pretty cool, right? And you are ready to publish our first post.
To write and publish a new article, you can use the navigation or menu on the left sidebar, click on ‘ Posts »Add New ‘ and you will be directed to a page where you can write the article. Click ‘ Preview ‘ to see the results of your writing before you publish it, and if you are sure to publish your writing, then just click ‘ Publish ‘, you can also publish your writing at the time you want by scheduling, changing the date and month above the ‘ Publish ‘ button.
And now you have a published article. And 30 minutes to make your blog complete, the remaining time you can use to design a blog or install a cooler WordPress theme, add plugins and make your WordPress site SEO Friendly .
Next 30 Minutes.
Yes, you’ve spent 30 minutes doing all of the above, from buying a domain and hosting, installing WordPress and creating new posts.
But before I end this post, I’m going to dig a little deeper for details to complement your blogging needs of starting a blog. Hopefully your site will become a successful blog and learn slowly but gradually until you succeed in turning your WordPress blog into a professional blog.
How do WordPress themes work & where to find great themes?
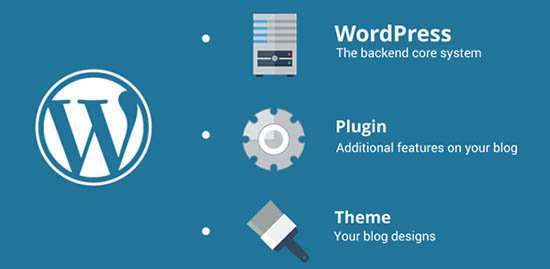
In general, WordPress blogs are supported by 3 core elements:
- WordPress Core : Built with PHP, JS, CSS, etc. files that make up the core system of your WordPress blog.
- WordPress Plugins : Addon files and functions that provide additional features for your blog.
- WordPress Theme : Design your blog. Buy a premium WordPress theme for only 69 thousand here .
The beauty of WordPress is that your blog design, which is known as the Theme, is separated from the backend system.
A WordPress theme is just a group of different files (usually php, css, js, and image formats) that control the appearance of a WordPress blog. Although some of today’s WordPress themes can be used to control more than just the prospect section of your blog.
The next question may be “Do I need to create my own WordPress theme?”.
Of course, if you wish. But of course you don’t have to do it because it requires coding knowledge and it certainly takes a long time to learn.
The reason is, most individual WordPress bloggers don’t create their own blog themes. Instead, what it does most often is to choose a ready-made WordPress theme and customize it according to our needs. There are tens of thousands of free WordPress themes that you can download and use however you like. If this is your first time building a WordPress blog, my advice for you is to start with a ready-made theme and customize the WordPress theme you use as you blog.
Here are some theme related resources for you to use.
Official WordPress Themes Directory
This is where you can get all the free WordPress themes. The themes listed in this directory follow the very strict standards provided by the WordPress developers, so in my opinion this is the best place to get free themes. However, since it’s a free directory, you may not get the kind of professional design and comprehensive theme functionality you want.
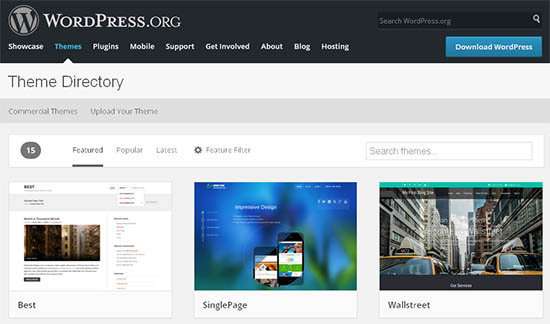
Visit the WordPress Themes Directory here .
Directory of Free WordPress Themes Centerclick
You can also see a lot of selected WordPress themes from CenterClick that you can download for free that are collected from various sources and developers. You can see the demo and download the theme at once.
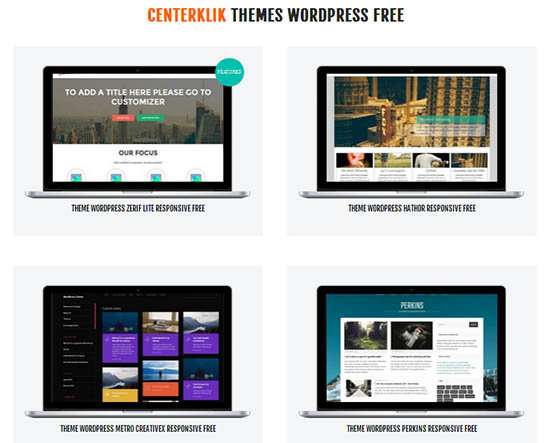
There are hundreds of free and responsive central click WordPress themes that you can use for free (free). See the Central WordPress Themes Directory, click here .
Premium WordPress Themes Directory
When it comes to paid directory themes, Elegant Themes is definitely my favorite. In Elegant Themes, you will get tons of premium WordPress themes at a very low price of $ 69 / year for 87 professional WordPress themes (the number is always increasing as they keep adding new themes, also if you compare this with Woo and Mojo, Elegant themes always price. cheaper), and most importantly, themes in Elegant are always updated according to the latest design trends and also to maintain security.
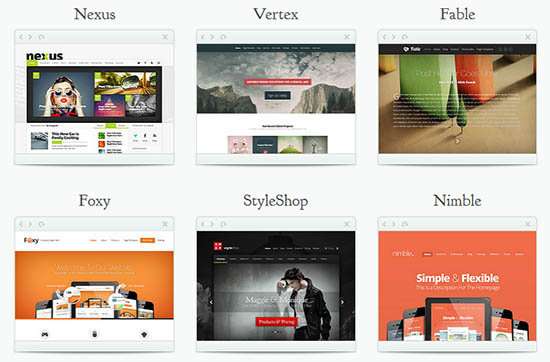
For your reference, here are some of the WordPress themes available on Elegant Themes. You can visit their site and see all their design themes in this directory. Visit Elegant Themes .
Apart from Elegant Themes, I also highly recommend you to buy a WordPress theme at MyThemeShop , where you will find lots of themes with the best designs and excellent features.
Essential Plugins for WordPress Beginners
One of the big reasons why WordPress is so widely accepted is the ease of use of plugins. Plugins ( What are Plugins ?) Are additional functions that you can add to your WordPress blog, such as backup sites or social media share buttons. Plugins not only make your life easier in managing your blog, they can also enhance your blog and protect your work. Lots of plugins are created for different functions, there are plugins forhref = “https://wpradar.com/improve-seo-wordpress-rage-google/” target = “_ blank” rel = “noopener noreferrer”> improve SEO, Social Share, online shop, Speed up WordPress Loading and still much more.
See List of Recommended Center Plugins, click here . or read the recommended article below
Here is a complete tutorial that you can use as a way to start a self-hosted WordPress blog. We wish you successful practice and your blog will go your way. May be useful. 🙂

